Restoring a Mechanical Russian Alarm Watch
June 11, 2013
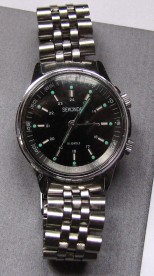
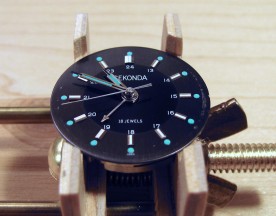
Shortly after my interest in Russian mechanical watches began, a particular Poljot (Полет) model equipped with a 2612.1 alarm movement caught my eye. A little research uncovered that the same watch, made by the 1st Moscow Watch Factory, was sold under the Poljot (Russian), Sekonda (British), and Cardinal (Canadian) brands.
Sekonda is a British firm which began importing mechanical watches from the Soviet Union in 1966, allowing them to offer remarkably high quality watches at low prices. It seems that most of the available examples of this particular model, made from 1990 to 1993, are Sekonda branded, and not surprisingly, most of those being sold on eBay are from UK sellers. Sekonda still exists today, and is in fact the top selling brand in the UK, but they no longer source watches from Russia.
I followed sales of this model for about a month to get an idea of a reasonable price for a watch in working order, concluding that I’d need to spend between $75 and $125 dollars to get one. When this one came along, it was listed for £65, about $105 at the time. The crystal was quite scratched, the hairspring was deformed, and one case screw was missing, so the seller agreed to reduce the price to £60. This was not a great price, but I bought it anyway. In all fairness to the seller, the watch was described accurately, all my e-mails were answered promptly and courteously, and there were no surprises.
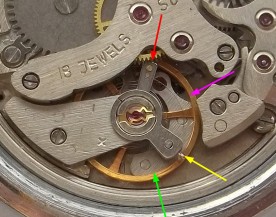
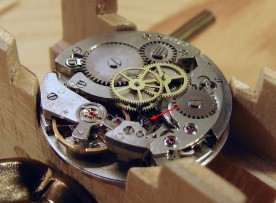
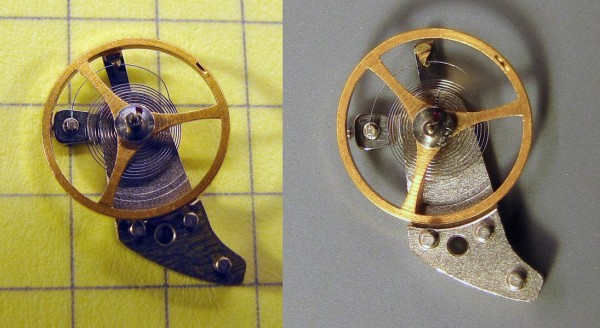
The regulator (red arrow) should be approximately where the magenta arrow is pointing, and the stud holder (yellow arrow) where the green arrow points. Also notice that the coils are not concentric, and that the terminal curve bows outward.
The biggest cosmetic issue with the watch was the severe scratching of the crystal, the restoration of which I have described in a separate article, Repairing a Scratched Acrylic Watch Crystal.
However, the watch had serious mechanical problems. When it arrived, I immediately timed it and found that it was running slow by about 28 minutes per day. The balance wheel amplitude was only about 86°, and there was about 10 milliseconds of beat error. The latter did not surprise me as the seller’s photos clearly showed that the hairspring was misshapen and that the stud holder was far from the positions seen in most 2612.1 movement photos.
These two issues alone could very well have explained both the beat error and low amplitude (a typical value being close to 270°), but I suspected there might be more wrong, so I decided to perform a complete cleaning, oiling, and adjustment. But first, I needed some watchmaking tools, which I will address in another article.
Disassembly and Cleaning
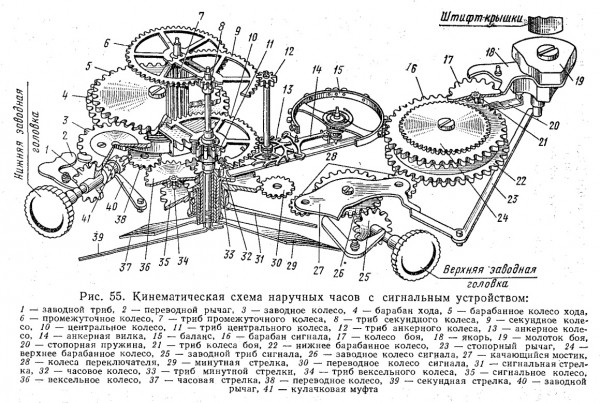
The first step in cleaning a watch is to completely disassemble it. The 2612.1 is slightly more complex than a movement without an alarm complication, so I used this article on the Watchuseek Forum as a guide. This diagram from the book Устройство и Технология Сборки Часов (Apparatus and Technology of Watchmaking) was also useful:
This particular 1MWF-made watch has a two-piece stainless steel case back, consisting of the case back itself, and a stainless steel locking ring that holds it to the case. A thin rubber gasket between the case back and the case prevents dust and water from entering the watch. The two-piece design ensures that the gasket is not distorted when screwing the case back in place.
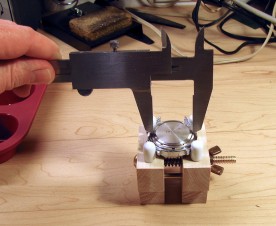
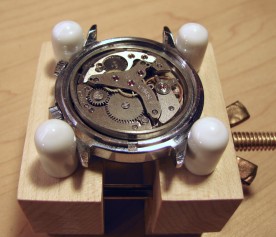
With the watch secured in a case holder, an inexpensive steel caliper makes a workable case back opening tool.
Removing the case back is done with the watch held in a case holder, using one of a variety of case back removal tools, all of which have two or three prongs to engage notches in the locking ring. An inexpensive steel caliper makes an adequate substitute, provided that the case back has not been over-tightened. After adjusting the caliper to the appropriate spacing, its locking screw should be tightened so that the tip spacing does not change while using it.
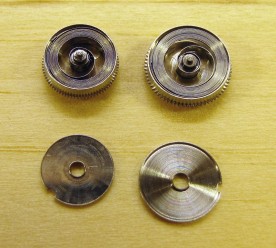
Once the case is opened and before proceeding any further, it is important to let down (unwind) the mainspring. Failure to do this will result in damage when parts of the gear train are later removed. This particular movement has two mainsprings, one for the time and one for the alarm.
The procedure for letting down a main spring begins with turning the corresponding crown slightly in the winding direction to remove the tension from the click (the ratchet that keeps the spring from unwinding). The click is then held away from the ratchet wheel using a pin, while holding the crown and letting it unwind slowly. An alternative procedure I discovered was to hold the ratchet wheel via its central screw using the appropriately sized screw driver, although there is the danger of the screwdriver slipping out of the slot and allowing the spring to unwind suddenly.
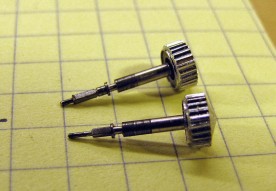
In order to remove the movement from the case, the winding stems must be pulled out. There is a small release button for each stem. Pressing and holding this button with a pin allows the corresponding crown and stem to be pulled out.
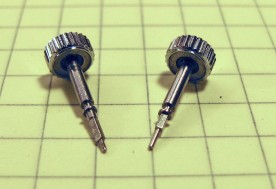
The main and alarm winding stems are slightly different in length and shape and thus are not interchangeable. Having never disassembled a watch before, I was quite surprised by the amount of dirty grease there was on each stem.
After the stems were out, the movement was unscrewed. There was only one case screw to undo, as the other was missing. To remove the movement from the case, I placed my hand over the face-down watch and then flipped it over, allowing the movement and centering ring to fall out into my hand. I then placed it dial side up in a movement holder.
With the movement held securely in place, I used a hands puller to remove the second and minute hands. To avoid scratching the dial, I covered it with a piece of paper with a slit cut in it to clear the central shafts.
My hands puller wasn’t fine enough to get under the hour and alarm hands, so I lifted those by prying from opposite sides simultaneously with a pair of hobby knife blades. When I later had to remove the dial again to make an adjustment, I found it was easier to simply use the dial itself to lift off the hour and alarm hands.
Removing the dial required loosening (but not removing) two very tiny screws accessible from the side of the movement, one at the 12 o’clock position, and the other at 7 o’clock.
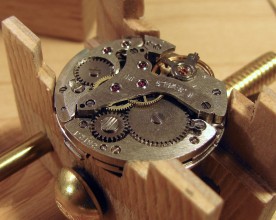
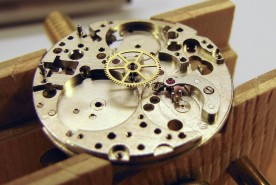
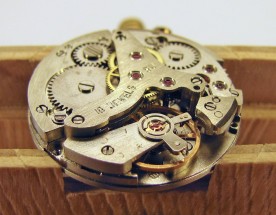
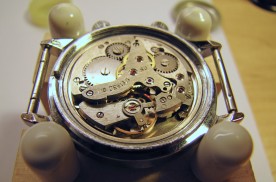
The clock side of the movement looks like that of any other watch, but with a few differences. The most obvious one is the second mainspring barrel which powers the alarm. This is the smaller one visible in the background of the photo.
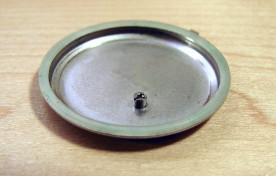
Another difference is the alarm hammer next to the balance wheel (top centre in the photo). When the alarm triggers, this hammer, powered by the alarm mainspring, strikes the anvil that is fastened to the case back, producing a buzzing noise. The anvil is mounted eccentrically to a stud on the case back, allowing it to be rotated to adjust the force with which the hammer strikes it.
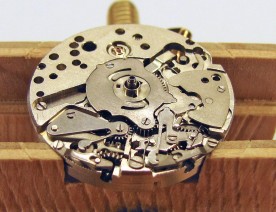
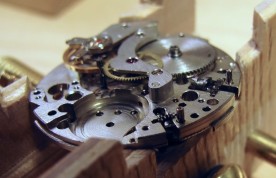
The alarm side of the movement is immediately behind the dial and is a bit more unconventional. The alarm setting wheel surrounds the hour, minute, and second hand posts. Every 12 hours, the irregularly spaced notches in this wheel line up with corresponding bumps in the hour wheel below it, allowing the alarm activation lever to lift the hour wheel slightly away from the main plate, in turn freeing the hammer to do its thing until the alarm mainspring runs down. The alarm can be disabled by either not winding it, or if it is already wound, by pulling out the alarm setting crown. This moves the alarm hacking lever (top right in the photo) so as to keep the alarm hammer stationary.
The first step in dismantling the movement was to remove the upper bridge, uncovering the third wheel (the one with four spokes), the fourth wheel (the one with five spokes), and the escape wheel. One thing that I noticed when removing this bridge is that these wheels’ pivots are extremely fine (about 0.1mm in diameter), and that my oiler would be far too large to fit through the jewel holes. However, these jewels are open on the other side (the top of the bridge and the alarm side of the main plate), and are intended to be oiled from that side.
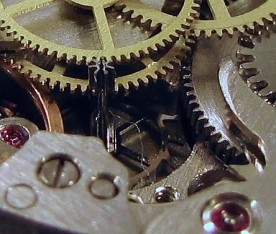
Removing the upper bridge immediately uncovered a problem. There was a fibre, possibly nylon, trapped in the escape wheel and passing through its spokes. This was clearly causing a significant amount of friction, and was probably originally responsible for the watch running extremely slowly, resulting in the misguided attempts to fix it by moving the regulator and stud holder and thus damaging the hairspring. That of course only made things worse.
I discovered another small fibre underneath the bottom surface of the upper bridge adjacent to the escape wheel upper jewel. It was held there by a film of oil. This fibre was probably not causing any problems, but the oil film suggests that the watch was over-oiled at some point, perhaps as part of the same attempt to correct a slow running watch.
The remainder of the disassembly did not result in any additional surprises. I completed disassembly of the entire clock side of the movement, leaving only the centre wheel and canon pinion. As each section was disassembled, the parts for that section were placed in one cup of a 12-cup silicone mini-muffin tray. I also took pictures every step along the way, in case I might need to refer to them later to figure out how to reassemble things.
Next, I turned the movement over and began disassembling the alarm mechanism, but I left the alarm hacking lever (which disables the alarm when the crown is pulled out) and its cover in place for fear of losing the springs. Dismantling the alarm mechanism is very useful in gaining an understanding of how it works. I have very little experience with watch movements, but it seems to me to be an elegant design.
When I was done with the disassembly, I debated whether or not to remove the cannon pinion from the centre wheel. Initially I’d decided to leave it in place for fear of damaging the wheel, but then started wondering if the wheel might be more damage prone while loose on the main plate of the movement.
With all the parts liberated from the movement body, it was time to begin cleaning them. An experienced watchmaker would place all the parts in a single mesh basket and put them in a watch cleaning machine or ultrasonic cleaner using the appropriate watch cleaning solutions.
Since I did not want to risk mixing up the parts from the different sub-assemblies, I cleaned the contents of each cup of the muffin tray separately. Each collection of parts in turn was placed in a strainer basket, which I then lowered into a jar of home-made cleaning solution. The parts were left to sit in the solution for a few minutes, lightly agitated periodically, and then brushed off with a fine paintbrush which had been trimmed short (which turned it into a stiff brush at the scale of watch parts).
After cleaning a batch of parts, the strainer was moved to a jar of rinsing solution, agitated slightly, moved to a second rinse jar and agitated again, and then tipped out onto a paper towel to dry. The parts were then returned to the muffin tray, and the process repeated with the next cup of parts.
One part that I treated differently was the pallet lever. The pallet jewels are held to the lever with shellac, and the cleaning solution contains alcohol, which softens shellac. Instead, I cleaned this part using only the rinsing solution.
Reshaping the Hairspring
As already mentioned, the hairspring was somewhat misshapen and needed to be reformed into the correct shape. After soliciting advice on the watch repair section of the Watchuseek forums, I decided to tackle this while leaving the spring attached to both the balance wheel and the stud.
To do this, I placed the balance cock (a one-ended bridge) on a block of wood, balance wheel up. I used a pair of very fine watchmaker’s tweezers to hold the spring at various points while using a pin to make small bends. It took a lot of trial and error (mostly the latter) until the coils were reasonably concentric and the terminal curve parallel to the other coils. Making adjustments often had a very different effect than I anticipated.
One technique I eventually discovered was to lift the balance wheel out of its jewel to see where the spring wanted the centre to be. This helped to clarify where adjustments needed to be made. In the end, after making many small adjustments, I came to the conclusion that the original problem was simply that the spring did not leave the stud tangentially, and that I probably could have fixed everything with a single adjustment there.
Oiling and Reassembly
A watch needs very little oil, and it needs the right grade of oil at each location. I searched the web for advice on which grades to use where, and eventually settled on using three different grades (viscosities of 150, 270, and 900 cSt) on the gear train jewels, with the lightest oil being used for the fastest moving, lowest torque applications. I used a fourth extra-light grade (90 cSt) on the escape wheel teeth and pallet jewels, and none at all on the pallet lever jewels. Note that only the bearings (jewels) of the gear train are lubricated; the gear teeth are left dry. The two mainsprings were lubricated with a custom-mixed mainspring lubricant (90 cSt oil and petroleum jelly).
All the rotating parts of the keyless works (the winding mechanism) were lubricated with the thickest grade of oil, whereas the sliding parts and gear teeth had a small amount of Teflon grease applied to them.
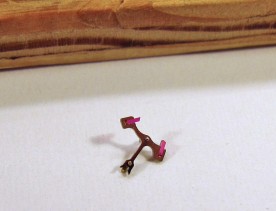
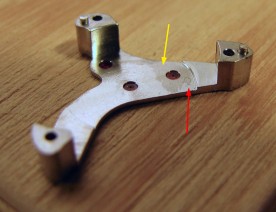
The pallet lever is one of the smallest parts. The wood in the background is 1/4 inch (6.3mm) thick.
The alarm mechanism in the 2612.1 movement contains many parts that slide against one another. The bottom of the hour wheel constantly slides over the alarm activation lever, while the bumps in the top of the hour wheel slide along the lower surface of the alarm setting wheel. Two springy fingers in the alarm cover plate slide along the top of this wheel. The Teflon grease was used to lubricate all of these areas.
I had disassembled the clock side of the movement first, followed by the alarm side, and had planned to reassemble it in the reverse order. As I got part way through reassembly of the alarm side, I discovered that there were some jewels that needed to be oiled from the alarm side, and that this needed to be done before installing certain parts. In hindsight, I should have begun reassembly with the clock side.
Some parts were quite tricky to reinstall (for a first-timer). For example, installing the upper bridge required lining up the pivots and jewels of the third, fourth, and escape wheels simultaneously while lowering the bridge in place. This is not a place for impatience or force, as these parts are extremely delicate.
Oiling the balance was also quite a challenge. Getting oil to the jewel on the balance cock requires lifting the balance wheel away from the jewel, and then passing the oiler between two coils of the spring without getting any oil on the spring. On my first attempt, I did get some oil on the spring, which caused the coils to cling together. As a result, I had to clean the balance assembly all over again.
Reinstalling the balance was frustrating since doing so required that the balance wheel be allowed to hang from the balance cock by the hairspring while lowering it into its jewel. After all the time spent reshaping the hairspring, I was nervous that all this fiddling would mess it up, but no harm was done. Apparently the weight of the balance wheel is far less than the minuscule forces I applied to reshape the spring.
Once the movement was back together, I temporarily installed the two winding stems and crowns. I gave the main crown a couple of turns, and nothing happened. A careful inspection revealed nothing amiss, so I gave it a few more turns, and the watch began ticking! I realized then that letting down the mainspring unwinds the watch much farther than it would unwind in use, since it will stop as soon as there is no longer enough spring force to keep it running.
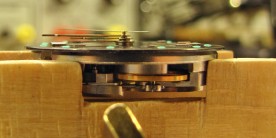
Next it was time to install the dial. The dial has two “feet”, which are simply pins that protrude from the back of the dial into holes in the movement plate. Recessed fixing screws hold the feet in place.
When I initially installed the dial, I found that I could not get it to sit flat on the movement. After some head scratching, I discovered that the alarm cover plate was not flush with the movement main plate because some of the wheels underneath had not meshed properly. After a partial disassembly and reassembly of the alarm works, the dial fit properly.
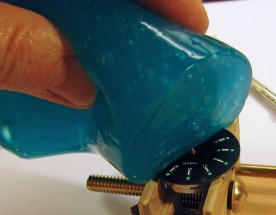
Before installing the hands, I cleaned debris and fingerprints off of the dial using a product called CyberClean, normally used for cleaning gadgets and computer keyboards. This blue gelatinous substance is slightly tacky but seems to leave no residue. When pressed against a surface, it oozes into all the nooks and crannies, and picks up whatever loose material is there.
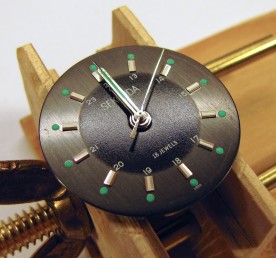
In order for the alarm to trigger at the time to which one has set it, the alarm and hour hands must be aligned. To do this, I first let down the clock mainspring so the watch was not running, and then turned the clock setting crown slowly counter-clockwise until I could feel and hear the hour wheel click into the alarm setting wheel. I then installed the alarm, hour, and minute hands, all pointing at 12 o’clock.
Alignment of the second hand is not critical, since the second hand keeps moving during setting anyway, so any alignment will be lost the first time the watch is set. I installed it pointing to 2 o’clock because it was easier to manipulate with the tweezers without the other hands in the way.
It’s important to make sure that all the hands are seated fully on their posts, and are all parallel to the dial and each other. Hands that are not installed correctly can rub on the dial or crystal, or get caught on one another, slowing down or stopping the watch completely.
The final step was to reinstall the movement in the case. With the case face down in the case holder, I cleaned the inside of the crystal and then placed the movement in position. I rotated it until the indices were properly aligned with the numbers on the chapter ring, and then installed the case screws. The watch came with one screw missing, but I found another that fit in an old broken Poljot movement that I had purchased for $7 as a source of parts.
Regulation
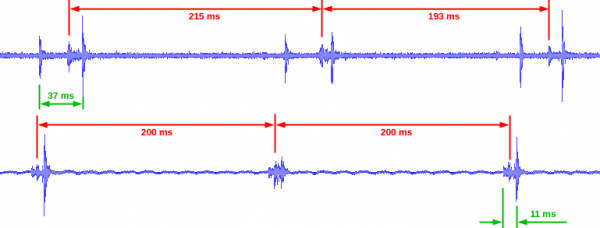
When I first received it, the Sekonda was running extremely slow, well beyond what could be corrected by moving the regulator. The misshapen hairspring and the fibre discovered in the escape wheel during disassembly were no doubt the causes of this. Although I had no intention of regulating the watch before the overhaul, I did make a recording of it to help diagnose the problems, and to compare its operation before and after the overhaul. The upper trace in the diagram below is that “before” recording.
Notice the very different lengths of the half beats. The 2612.1 movement operates at 18,000 half beats per hour, which works out to 200ms per half beat. The alternating 215ms and 193ms half beats add up to 408ms for a full beat, which is 2% too long. That corresponds to a loss of about 1700 seconds (about 28 minutes) per day. Furthermore, there is about 11ms of beat error (the difference between the actual beat lengths and the average), no doubt caused by the stud holder being far from where it should be.
That is not all that was wrong with the movement. The other important parameter is the length of each individual tick and tock sound. Ticks and tocks consist of three separate sounds each as the pallet jewels interact with the escape wheel teeth. The longer a tick or tock takes, the slower the balance wheel is being spun, and the less it will swing in each direction. With a 37ms tick length before the overhaul, the balance wheel had a swing amplitude of only about 86°.
After overhauling the watch, I initially set the regulator and stud holder to average positions, which resulted in about 7ms of beat error and a watch that was fast by about 100 seconds per day. After further adjustments, the result was what you see in the bottom trace: no measurable beat error, and a full beat length of 400ms.
The tick and tock lengths were now each about 11ms, corresponding to an amplitude of approximately 284°. Since typical amplitudes for a wristwatch in good working order are in the range of 260° to 315°, I was overjoyed with that result.
Finishing Up
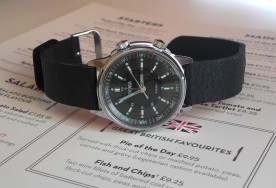
With the Sekonda now in good working order, all that remained was to put a strap on it. I didn’t really like the bracelet it came with, and it was too long anyway, even with all the removable links removed. I had a modified Bond-style nylon NATO strap on hand, so I put that on the watch and wore it for a week.
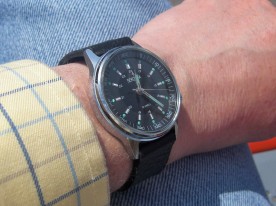
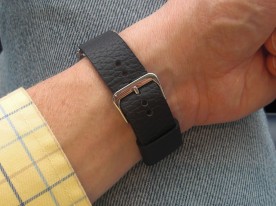
I’m not really a fan of nylon watch straps, and most commercially available straps are too long for my wrist, so I decided to make a new leather one. The details will be the subject of another article, but briefly, each piece is made from an 18mm wide strip of 1mm thick leather, folded and glued to make a 2mm thick strap. The buckle was taken from an old strap. I think the slightly textured plain black strap suits the watch nicely.
After wearing the watch for a few weeks, I found that it was running fast by about 20 seconds per day, so I opened it up for further adjustment. The regulator is very sensitive, and the amount of movement needed to adjust for even that much error was almost imperceptible, but I got lucky and got the watch running about 1 second per day slow.
I then took the watch on a week-long business trip to the UK, where I’d planned on using the alarm feature to wake me up in the mornings. Unfortunately, winding the alarm no longer worked when I arrived. It felt as if the click was not engaging the ratchet wheel. Not having the appropriate tools with me, I waited until my return to fix it. Upon opening the watch, I discovered that the alarm ratchet wheel screw was loose, allowing the wheel to lift up over the click. I tightened the screw and now all is well.
Conclusion
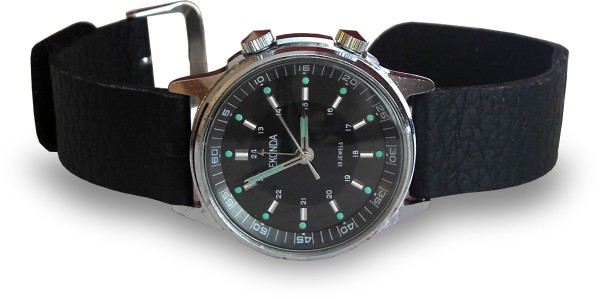
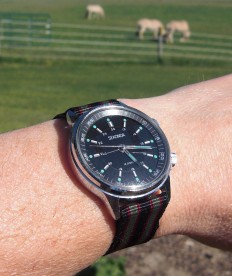
There is a huge variety of Soviet and Russian made watches using the Poljot 2612.1 movement, but to my eye, this is one of the nicest looking ones. Sekonda and Cardinal must have thought so too, as it’s one of the few that made it into their line-ups for sale in the UK and Canada (the other commonly seen one is similar, but with a gold plated case, hands, and indices). The dial is uncluttered and has good contrast. Not that I usually worry about such distinctions, but I also think the style bridges the boundary between casual and formal, being suitable for both. And, I think it just looks sharp!
Related Articles
If you've found this article useful, you may also be interested in:
- Building a Musical Sunrise Quartz Alarm Clock
- Making Custom Watch Dials
- Why Negative LCDs Are So Hard to Read
- A Riff on a Russian Navigator’s Watch
- Turn a NATO Strap into a Two Piece Watch Strap
- Repairing a Scratched Acrylic Watch Crystal

If you've found this article useful, consider leaving a donation in Stefan's memory to help support stefanv.com
Disclaimer: Although every effort has been made to ensure accuracy and reliability, the information on this web page is presented without warranty of any kind, and Stefan Vorkoetter assumes no liability for direct or consequential damages caused by its use. It is up to you, the reader, to determine the suitability of, and assume responsibility for, the use of this information. Links to Amazon.com merchandise are provided in association with Amazon.com. Links to eBay searches are provided in association with the eBay partner network.
Copyright: All materials on this web site, including the text, images, and mark-up, are Copyright © 2025 by Stefan Vorkoetter unless otherwise noted. All rights reserved. Unauthorized duplication prohibited. You may link to this site or pages within it, but you may not link directly to images on this site, and you may not copy any material from this site to another web site or other publication without express written permission. You may make copies for your own personal use.

Avinash Lewis
June 12, 2013
I Never knew you had passion for watched.. I used to repair many during my college days, But now i altogather never wear it, with so many electronic devices round.. like cellphones
Sulie
July 09, 2013
Wonderful restoration, and great tips … will give this a go 🙂
So you sell on any of the restored ones ??
Cheers
Sulie
Stefan Vorkoetter
July 09, 2013
I’m glad you liked the article! Sorry, I’m not selling any watches at the moment. I’m just restoring them for my own use, but if I ever plan to sell one, I’ll be sure to mention it here.
Paul
October 25, 2013
You are a brave man, an alarm watch is not the easiest to start with and you did a great job. I too have one of these watches, only bought because the guy who teaches me clock repair has one and says it is a good movement.
Well done 🙂
matabog
August 07, 2014
Hello!
What formula did you use to obtain the amplitude knowing the tick-tock length?
Thank you!
Bogdan
Tony
November 07, 2014
Just stumbled on this great restoration job! Love the crystal polishing page also. Could you give more details on the cleaning and rinsing solutions as well as the sources of oils? Thanks.
Radek
December 13, 2014
Hi.
Nice to know how to restore that kind of watches.
If I can ask question. Do you know for any chance where I can restore dial of my Poljot alarm watch???
Stefan Vorkoetter
December 13, 2014
You could try David Bill & Sons in the UK: http://www.davidbill.co.uk
I haven’t personally used them, but a watchmaker I respect sends dials to them for restoration.
Geo!
April 22, 2016
That’s an excellent job and a brilliant write up. The end result is superb!
John Smith
October 17, 2017
Whew, life saver walk through. I am only restoring cases and forgot to write down which stem goes where. Awesome. Thank you.
DANIEL
August 12, 2018
Very interesting, thank you. This Poljot alarm movement looks almost identical to the A. Schild 1475 movement in my 1960s-ish Baylor alarm watch. I wonder if Poljot copied/modified the movement?
Stefan Vorkoetter
August 12, 2018
Yes, it is indeed a copy of the AS 1475. Quite a few Soviet movements are copies of Swiss movements, but it is my understanding that in at least some cases, they purchased the tooling from the Swiss. Another example is the 3133 chronograph movement, which is about 95% identical to a Valjoux 7734 (and whose service manual I use for reference when servicing a 3133).
Jeff j Wulf
December 24, 2021
Thanks for your page. I LOVE vibrating alarm watches and the old Poljots fit my love for that AND mechanical watches. I’ve purchased a few and have some experience under my belt, your page was very useful. Thank you very much.
Neil C
January 09, 2022
I’ve just been given one of these watches by my father in law. Its the gold version and although looking its age and not working, i like it enough to try to get it working. Finding your site is going to help greatly, thank you.