Turn a NATO Strap into a Two Piece Watch Strap
July 7, 2013
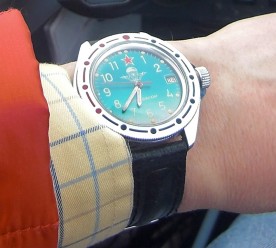
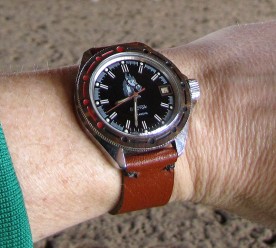
The second Russian watch to join my collection was a used Soviet-era Vostok “Generalskie” (Восток “Генеральские”) with a paratrooper-themed dial. Since I prefer working with horses over jumping out of perfectly good airplanes, I refitted the watch with a cavalry dial. The watch was delivered with an inexpensive leather strap which would have been usable but for the fact that it was too long for my wrist, and too formal for a watch I planned to wear around the farm yard.
So, the first thing I did after changing the dial was to make a new, more rustic looking, leather strap for it. That strap turned out acceptably well for a first attempt, and I liked the look of it, but it had two problems. One was that the finish used on the leather was too stiff. With two layers glued back to back, bending the watch band would cause one side to crumple up. The other problem was that leather does not like to get wet, something that is bound to happen when working in the barn.
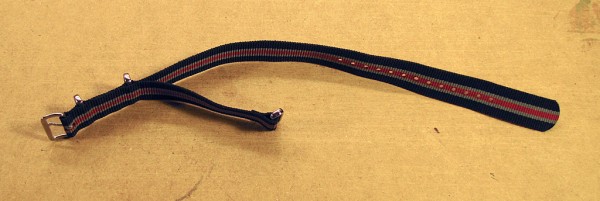
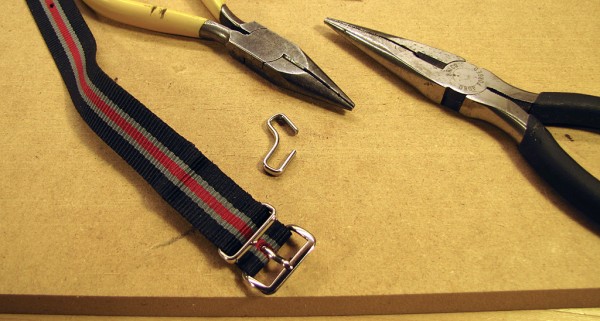
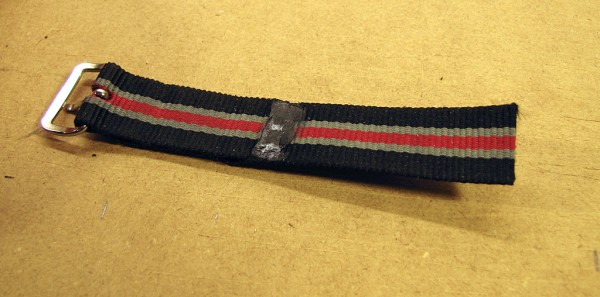
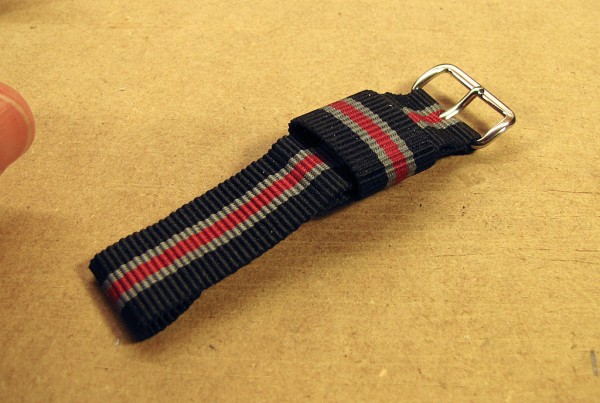
Hanging out on the Watchuseek forums, I quickly discovered the existence of so-called NATO watch straps, made out of a single piece of nylon webbing. Here is a typical NATO strap, which I purchased from The NATO Strap Co. (which has great prices, free shipping, and super-friendly service):
The long strap passes over the watch’s upper spring bar, under the watch, over the lower spring bar, and then through the ring in the short strap. It is then worn like a traditional watch strap, except that any excess is folded back and tucked into the keepers.
What I didn’t like about this is that there are two layers of strap between the watch and my wrist, making the watch sit quite high. Since I have small wrists, there was also a lot of excess strap to tuck into the keepers, resulting in four layers of nylon on the outside of my wrist. Both of these issues make the rather thin NATO strap bulkier than a typical leather strap.
I’ve come across a few articles advocating removing the short strap and shortening the long strap, but that still leaves a layer of nylon under the watch, and the excess strap ends up flopping around in the keepers because they are designed to accommodate two layers of material. So, I decided to turn my NATO into a more traditional two-piece strap.
The first step was to cut off the short strap, saving the material to eventually make a keeper. I cut the material with a sharp hobby knife, but good sewing scissors would also work.
Next, I removed the metal keepers, since my plan was to replace them with a single tighter-fitting nylon one. The keepers are easily removed by grasping the two ends with pliers, and bending them open.
Due to the size of my wrists, my preferred watch strap size is about 75mm for the buckle part (not including the buckle), and 100mm for the tang part. If you have typical “medium” sized wrists, lengths of 85mm and 110mm are more appropriate. To allow enough material to fold over to form a loop around the spring bars, I cut the buckle part 15mm longer, to a length of 90mm.
Cutting the tang part to length was a little trickier. If I had just cut it 115mm from the rounded end (to achieve a finished length of 100mm), then there would be holes all the way to the spring bar loop. I decided that I wanted the holes to stop about 20mm before reaching the watch, so I measured 35mm from the last hole (20mm + 15mm for the loop), and from there 115mm back towards the rounded end.
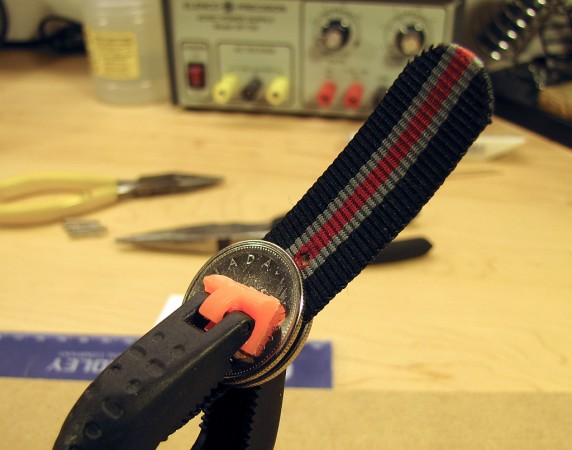
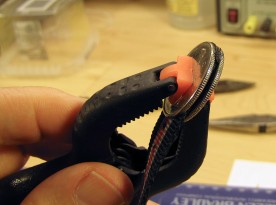
I then clamped the strap between a pair of Canadian quarters at that point, adjusting them slightly so that there wouldn’t be a hole right at the tip.
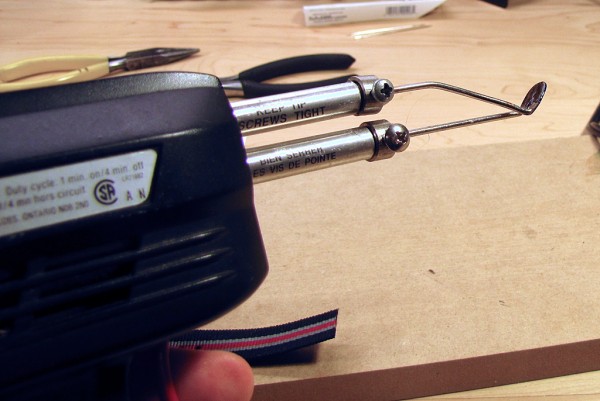
To both cut and seal the rounded end, I brought out my Weller soldering gun. Although rated at 140W, this gun is terrible for soldering because it doesn’t have enough thermal mass. Soldering anything that actually needs that much power quickly cools the tip below the melting point of solder. However, with the supplied smoothing tip, it’s a great tool for cutting and sealing nylon.
Cutting and smoothing the edge in one step doesn’t work very well. As one cuts the strap, the excess piece falls over onto the heating tip, melts, and deposits globs of nylon on the cut edge. Therefore, I first cut the end roughly and quickly, a few millimetres from the coins (I used the soldering gun for this, but sharp scissors might have been easier). I then used the tip to shave off and smooth what was left.
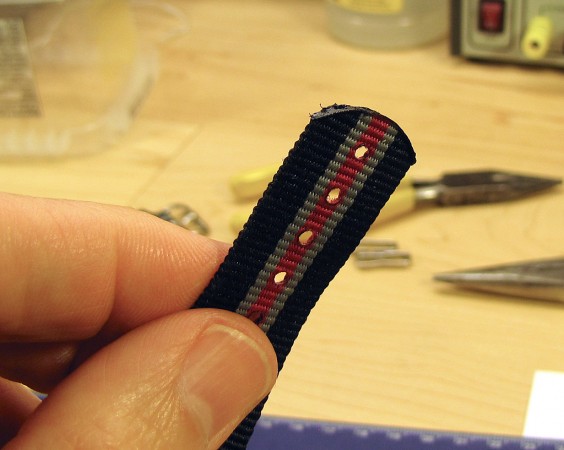
After removing the coins, the edge was smooth, but there was some flashing at the edges of the edge. I removed this by carefully cutting it away with a sharp hobby knife, and then sanding lightly with very fine (320 grit) sandpaper.
With the rounded end completed, it was time to cut the tang to length. As I was aiming for a finished length of 100mm, I cut it to a length of 115mm to allow for the spring bar loop.
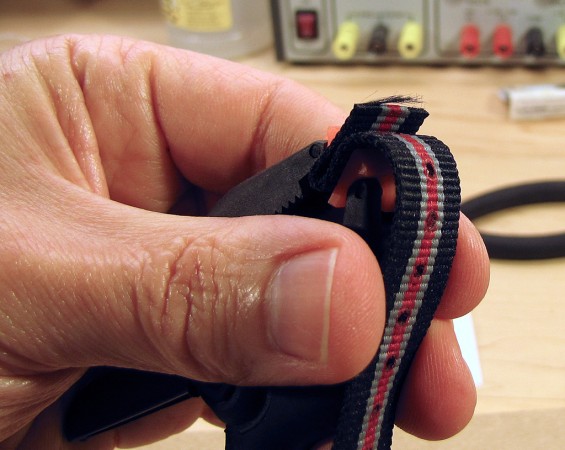
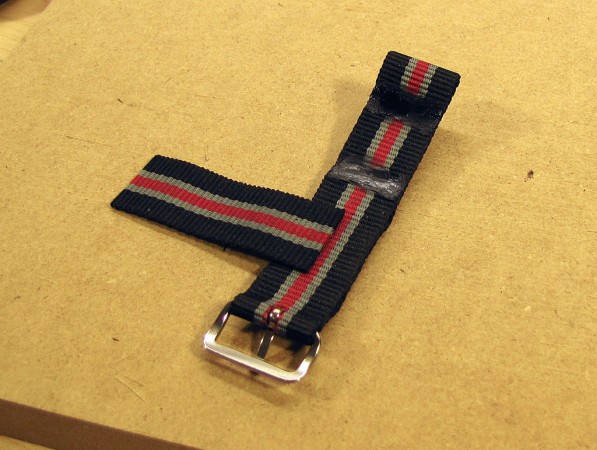
To form the spring bar loops, I first folded over the end of each piece, being careful that the folded part lined up exactly with the rest of the piece so that the end is square, and the folded material does not protrude from the side of the strap. I used a small clamp to hold the fold in place, and then measured the overall length to ensure I’d get the desired finished length.
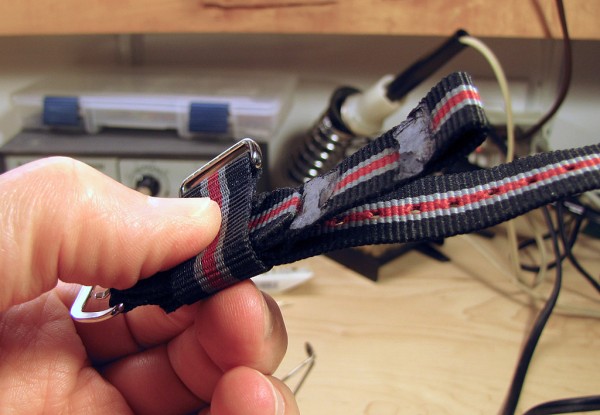
Next I heated up the soldering gun and inserted it between the strap and folded tab along the centre line of the strap (the red and grey stripes), slightly melting both surfaces. I withdrew the gun and pressed the two halves together (be careful not to burn your fingers). This made a strong joint, but not a very neat one.
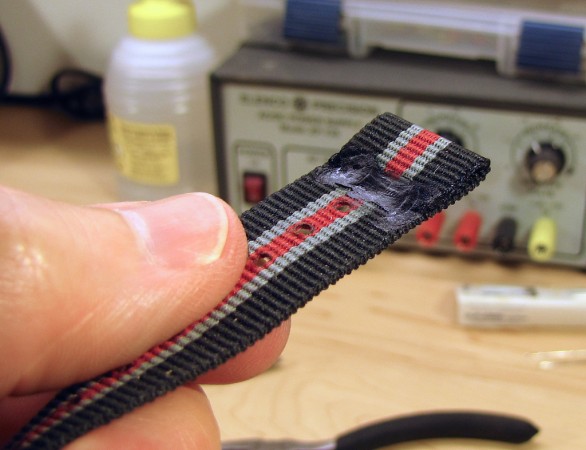
To finish the loop, I used the soldering gun again to smooth the joint, blending the fold into the back of the strap. My experience from the two previous straps I made told me to always smooth either lengthwise away from the spring bar end, or crosswise towards the centre. Smoothing crosswise towards and over the edges can result in distorted edges, visible from the outside of the strap.
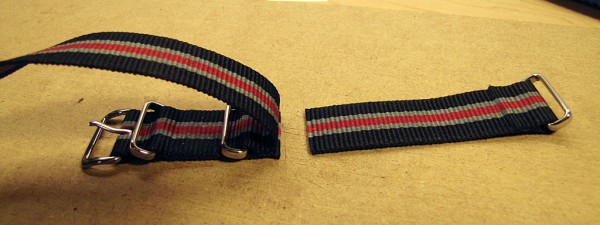
After completing the loop on the tang half of the strap, I sealed and smoothed the cut end on the buckle half where the original short strap had been cut off, and then formed a loop the same way as I did for the tang.
As I mentioned earlier, I did not keep the original metal keepers, because they were designed to hold a double thickness of strap material, and thus would be too loose for just a single strap end. Instead, I made a keeper out of the short strap that I’d cut off.
To determine the length of the nylon keeper, I wrapped the short strap tightly around the buckle strap and two extra layers of strap. This ensures a secure but not overly tight fit for a single layer of strap. I then cut the short strap to length so that there was no overlap.
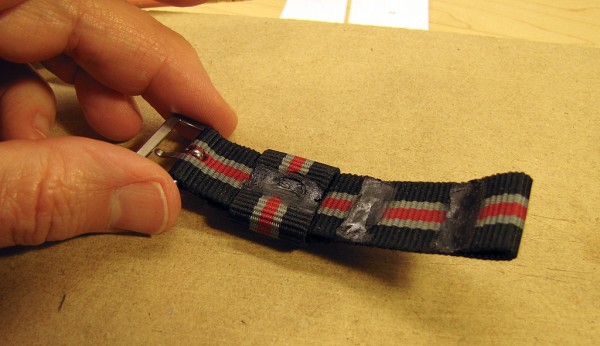
There were two bulges in the buckle strap where the original metal keepers had been, so I centred my nylon keeper between the two. I placed the keeper on the underside of the strap, being careful that it was at right angles. I then welded the one end in place by briefly heating both the keeper and strap at the same time, and pressing them together (the same way I’d welded the folds at the strap end).
With the one end securely welded, I wrapped the keeper around the outside of the strap, butted the other end against the first, and then used the soldering gun to smear them together.
After completing all the welding, sealing, and smoothing of joints on both halves of the strap, I used some fine sandpaper, rolled into a small tube, to carefully smooth out the surface and edges of each area of melted nylon. When no longer in the form of fabric, nylon is surprisingly hard, and even small imperfections can feel scratchy.
One thing I was not entirely happy with was the spring bar loops. On my first two straps, I had welded the loops (melting both surfaces and pressing them together) across their full width and almost all the way to the end, leaving just enough space for a spring bar. With the second of these two straps, the welding had distorted the strap edges, leaving an unsightly indentation visible from the outside, so for this third strap, I had welded only a small spot near the centre.
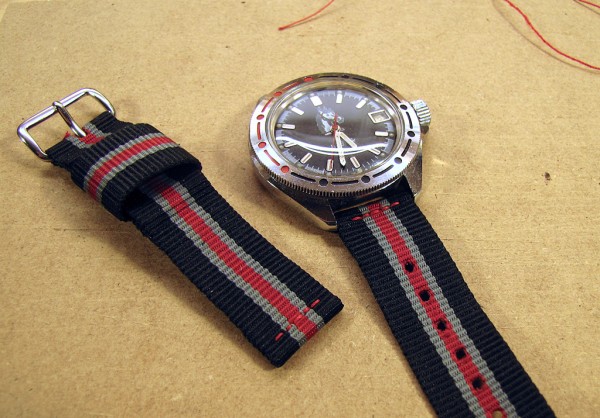
To tighten up these large loops, I decided I’d add some stitching. I had some heavy duty red nylon thread on hand which I thought would suit both the strap, and the watch it was intended for.
Before stitching, I inserted a length of 14AWG solid copper wire, which is about the same diameter as a spring bar, into the end of the loop to ensure I wouldn’t close the loop up too tightly. I then threaded both ends of a 30cm long piece of thread into separate needles, and saddle-stitched (stitching both ways through each hole) across part of the width of the strap. The ridges in the nylon material made it easy to stay on a straight line.
For the last stitch, I only stitched from outside of the strap to the inside, leaving both ends of the thread on the inside. I tied these into a knot, which I fused by touching it briefly with a fine-tipped soldering iron.
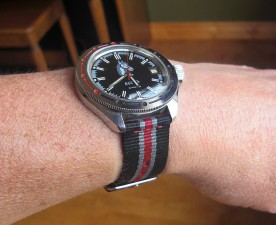
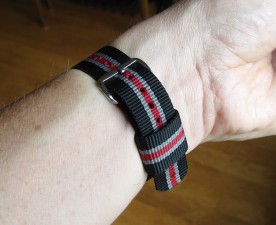
Installing the strap on the watch was much easier than installing a leather strap. Although the 18mm nylon strap is an exact match for the 18mm lug width of the watch, nylon is much more compressible than leather, so it’s easy to push the end of the spring bar down to fit it between the lugs without the strap getting in the way.
That’s all there is to it! Of course, this is only one of many ways the job could have been done. If you don’t have any soldering equipment, you can simply seal all the cut ends with a match or lighter, and then glue or stitch all of the joints instead of welding them. If you prefer, you can retain one or both metal keepers instead of making a nylon one. If you’re feeling wild, you could even make a two piece strap out of parts cut from two NATO straps of different colours.
Related Articles
If you've found this article useful, you may also be interested in:
- Building a Musical Sunrise Quartz Alarm Clock
- Making Custom Watch Dials
- Why Negative LCDs Are So Hard to Read
- A Riff on a Russian Navigator’s Watch
- Restoring a Mechanical Russian Alarm Watch
- Repairing a Scratched Acrylic Watch Crystal

If you've found this article useful, consider leaving a donation in Stefan's memory to help support stefanv.com
Disclaimer: Although every effort has been made to ensure accuracy and reliability, the information on this web page is presented without warranty of any kind, and Stefan Vorkoetter assumes no liability for direct or consequential damages caused by its use. It is up to you, the reader, to determine the suitability of, and assume responsibility for, the use of this information. Links to Amazon.com merchandise are provided in association with Amazon.com. Links to eBay searches are provided in association with the eBay partner network.
Copyright: All materials on this web site, including the text, images, and mark-up, are Copyright © 2025 by Stefan Vorkoetter unless otherwise noted. All rights reserved. Unauthorized duplication prohibited. You may link to this site or pages within it, but you may not link directly to images on this site, and you may not copy any material from this site to another web site or other publication without express written permission. You may make copies for your own personal use.


CLay
June 11, 2014
Nice job on the strap. Nice watches, too – I have a few of the same ones.
Jake
October 17, 2014
Or you can buy a similar style in a two-strap configuration for about $8 and save you 2 hours from doing all these steps. Silly article
Stefan Vorkoetter
October 18, 2014
And a good day to you too sir. First of all, making one of these takes me about 15 minutes, not 2 hours. And some people like to make things with their hands in their spare time. Would I be better off spending that time watching TV, or reading on-line articles that I consider silly?
John L-M
February 07, 2015
Nice work! Leaves me with some food for thought. I’ve got a PRS-40 from Timefactors (http://www.timefactors.com/smiths.htm) that has fixed lugs. I’m wanting to make a single piece strap as natos are a bit thick and cumbersome. The PRS-40 has fixed lugs anyway, so a nato seems a little extraneous- the whole idea of a nato strap is to retain the watch if a spring bar is lost. You’ve given some good tips.
John
Stefan Vorkoetter
February 07, 2015
Interesting, as I was just reading up on Timefactors’ watches, specifically the PRS-29A, which also has fixed lugs. I’ve made quite a few single-piece straps too, in addition to the two-piece described in this article.
John
August 07, 2015
Thanks! This is going to be huge for apple watch users because nothing should cover the back side of the watch! Also, to the user that said just buy one, the choices of colors and sizes for two piece NATO bands is very small. This allows for a lot of customizability. Thanks for the detailed instructions, I’ll give it a try! Wouldn’t have thought it was doable otherwise!
James
October 28, 2015
Nice job, Stefan!
I also like the leather ‘rustic’ one. How do you do the stitching on the sides like that, is there a name for this?
Thanks
James
Stefan Vorkoetter
October 28, 2015
I don’t know if it has a name, but to do it, you just poke a hole through the leather, pass the needle and thread through the hole a few times, and then tie the loose ends at the back.
MATTHEW
February 18, 2016
I love this! i cant wait till i get my nato strap so i can do this for my gshock g7900!!!!
Ashley Pomeroy
April 14, 2017
Half-way through I was thinking “urg, what’s the point”, but when you got to the point about the stitching I changed my mind – it looks really good. As long as the solder marks are hidden.
Watch Collector
October 09, 2017
Wow, that looks great! Do you think it would work with a zulu/leather nato too?
Stefan Vorkoetter
October 09, 2017
Yes, but you’d need to use some sort of glue and/or stitching.
John
December 09, 2019
Nice read! I like to see how others get on with clever projects, sometimes spawns other ideas.