Making Custom Watch Dials
October 4, 2015
The variety of aftermarket hands and dials available to the amateur watch customizer is growing steadily. The selection depends on the movement being used, with one of the largest collections being offered for Seiko movements, by sellers such as Dagaz Watches and Yobokies. When working with other movements, the selection is more limited or sometimes non-existent.
In the last year, I’ve undertaken three projects in which I was unable to purchase the desired dial:
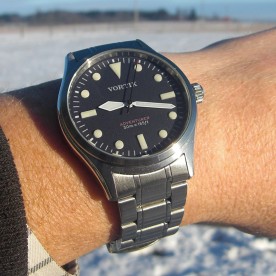
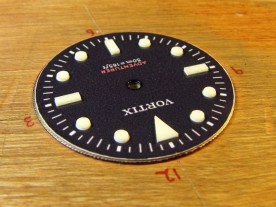
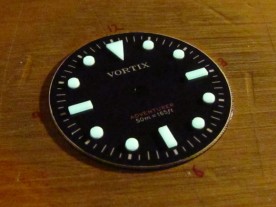
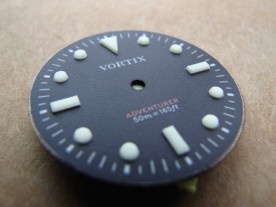
- Adventurer, a 39mm Explorer-style watch featuring a dial and hands modeled after a military version of a vintage Rolex Submariner. This watch was based on an Orient Chicane, whose movement accepts Seiko-compatible hands, but an oversize Submariner-style dial was simply not available.
- Oceanographer, paying homage to the Omega Seamaster 300, and based on a Vostok Amphibia. The stock hands were close enough to the desired style, but none of the many available new and vintage Vostok dials looked even remotely like that of the Omega.
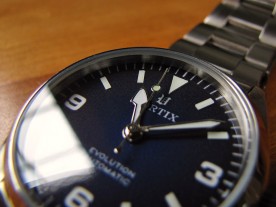
- Evolution, another Explorer-style watch, this time based on a 36mm Alpha Explorer, with a dial combining design cues from both the 1016 and 14270 Rolex Explorers, and hands in vintage Tudor Ranger style. Appropriate hands were easy to find for the Sea Gull movement, but the dial I had in mind did not exist.
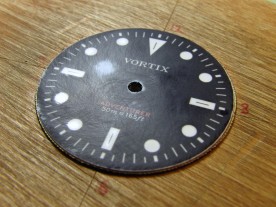
- Vortix “Oceanographer”
- Vortix “Evolution”
The solution for each of these projects was a home-made dial. The Adventurer and Evolution dials were made using high-quality photo paper, and the techniques used are described in the remainder of this article. The Oceanographer dial used a different technique (water slide decal over luminous film), and will be described in a separate article later.
Preparing the Existing Dial
All the dials were made using the original dial as a base. The dial was removed from the watch, the existing indices and artwork stripped off, new artwork and indices applied, and the dial reinstalled. This requires opening the case back, removing the crown, removing the movement and dial as a unit, removing the hands, and finally separating the dial from the movement.
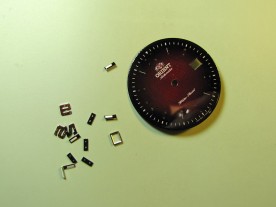
The Orient and Alpha dials both had applied indices and numerals, and the Orient also had a date window frame. These were easy to remove by pushing them out from the back using a pin. I saved these parts for possible use in future projects.
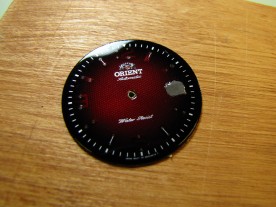
With the applied bits removed, the next step was a bath in acetone. This had different effects on the two dials. From the Orient dial, it removed the Orient logo and all the printing (minute indices and “Water Resist”). The dark red transparent base colour was left completely untouched. The Alpha dial on the other hand was stripped clean by the acetone. Both the base coat and all the printed markings came off, almost as a single sheet.
None of my designs called for a date window, but the Orient dial had one, which needed to be filled in. I applied a piece of tape over the window on the back of the dial, and then filled the window with JB Weld (steel-filled epoxy) from the front, using just enough to protrude slightly above the front surface. This would be sanded level later.
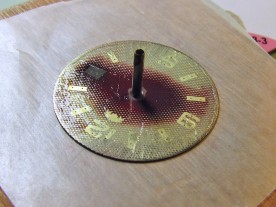
Since the Orient dial’s base coat was unaffected by the acetone, I resorted to sanding to get almost down to bare metal. This also took care of levelling the date window filler. To hold the dial securely for sanding, I prepared a hardwood block, drilled with a pair of holes for the dial feet and a central hole for a 2mm brass tube (the same diameter as the dial hole). During sanding, the tube was pushed down flush with the surface of the dial so the sanding block could pass right over it.
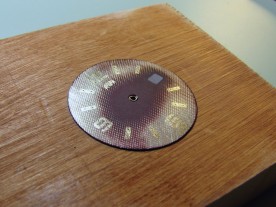
I sanded using wooden blocks faced with sandpaper. I started with medium grit paper to remove most of the base coat quickly. Once I was nearly down to bare metal, I switched to progressively finer grits to produce a reasonably smooth finish. The Orient dial had a slight texture embossed in the brass, so I stopped when the remaining lacquer was flush with the brass.
Dial Artwork
There are many ways to create new dial artwork. Commercial dials are usually made by pad printing markings on top of a lacquer or enamel background, a process requiring specialized skills, equipment, and inks.
Fortunately, with some care, today’s inexpensive consumer-grade inkjet printers are capable of producing artwork almost as nice looking as many commercially printed dials, lacking only the texture of thickly printed inks.
To print a high resolution dial, one needs to start with high resolution artwork. This can be prepared interactively using tools like Adobe Illustrator or Photoshop (the latter is not ideal, as it provides no facilities to easily align things precisely).
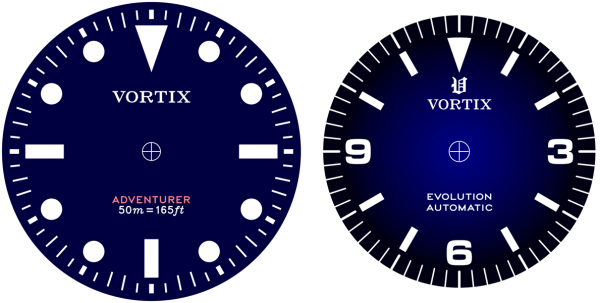
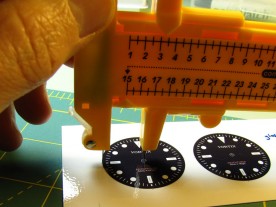
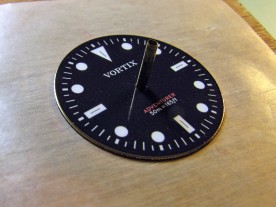
Alternatively, if you have the skills and appropriate programming tools, you can write a program to generate the artwork. Doing it this way makes it easy to generate evenly spaced and sized indices and perfectly centered text. It also allows experimenting with dozens of dial variations by adjusting a few parameters and running the program again. I created my dial artwork using a program written in the Maple language. After determining the required dimensions by measuring the existing dial and case, I wrote a program to generate a 1200dpi TIFF image (reproduced above at a lower resolution).
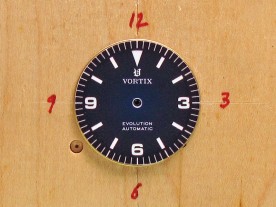
To ensure proper alignment of the artwork to the dial blank, movement, and case, I marked the 3, 6, 9, and 12 o’clock positions on the dial holding block I had made earlier. This is best done before removing the existing artwork. Precision is important here, because even tiny misalignments can be apparent in the finished product. Make the alignment marks with a very sharp hard pencil or with a hobby knife.
Printing Tips
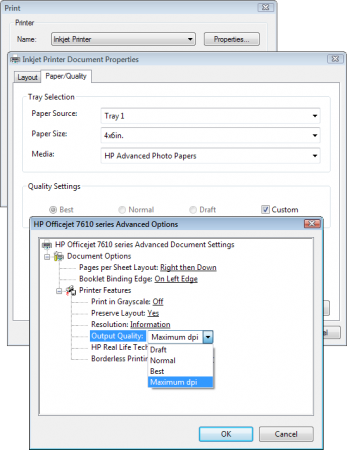
Depending on your printer, you may have to go into the custom settings to achieve the desired resolution. For my HP OfficeJet 7612, this involves choosing the appropriate paper type, and then selecting “Maximum DPI” in the advanced settings dialog.
Many inkjet printers will print purely black and white artwork using only black ink, but will switch to colour ink if there is any colour in the artwork. With the aforementioned HP printer, I found that the black ink did not produce a very satisfactory result at all. To get around this, I regenerated the dial artwork so that the black areas were actually a very dark blue (about 8% brightness). Printing this resulted in a much sharper image that was indistinguishable from black.
When printing large images such as photos from your vacation, the printer will usually print a few centimetres of the image, and then pause as it assembles the next stripe in memory. During this pause, the previous stripe has a chance to dry, and when the next stripe is eventually printed, a very slight ridge results. This is imperceptible on photographs, but very visible on a solid colour watch dial.
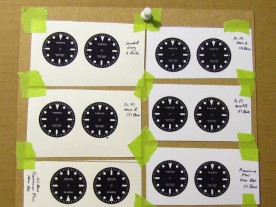
Fortunately, watch dials are very small, and I’ve found that the printer can print a small image consisting of only one or two copies of the dial without pausing. To avoid feeding the same sheet of paper through the printer over and over when printing multiple copies, I cut the letter-sized sheets of photo paper into six approximately square pieces. I then print two dials on one piece at a time.
Making the Dial
The Adventurer and Evolution dials were printed on HP Premium Plus Glossy Photo Paper. This paper allows very high resolution printing without the individual ink dots spreading and producing fuzzy edges.
After waiting a few hours for the ink to dry, I applied several coats of Krylon Crystal Clear gloss acrylic lacquer, waiting a few minutes between coats. This serves to protect the artwork from damage while working with the dial.
Unless you work in a clean room, there’s a very good chance that the artwork will pick up a speck or two of dust while the lacquer is drying. The odds of this happening can be reduced by thoroughly vacuuming the area in which you will be working, and by minimizing air circulation by closing windows, doors, and heating vents. However, dust specks will still happen, and the best way to deal with them is to prepare several dials at once, in hopes that at least a few will turn out.
Once the lacquer is thoroughly dry (I’d suggesting waiting 24 hours), the dial can be cut out using either very sharp scissors or a circle cutter. Look at each dial carefully under a loupe and choose one with no printing or finishing defects.
If the completed dial is to have a gloss finish, it should be polished before cutting it out. Even the most carefully applied gloss lacquer will have a bit of texture that can be polished away. I used a 12000 grit MicroMesh pad, followed up with polyWatch acrylic watch crystal polishing compound, to produce a near mirror-like finish.
When cutting the dial with a circle cutter, use a new sharp blade, place the pivot of the cutter in the centre of the artwork, and carefully adjust the radius so the blade falls exactly on the edge of the artwork. Then, while holding the cutter stationary and applying very light pressure, rotate the artwork as many times as necessary to cut cleanly all the way through.
Regardless of the technique used to cut out the dial, try not to touch the dial itself. The lacquer picks up finger prints easily and they can be remarkably hard to remove.
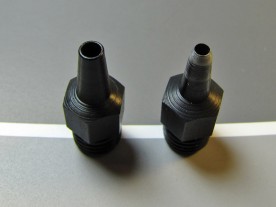
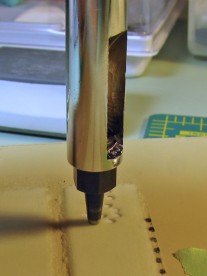
The easiest way to cut the centre hole is to use a punch. Most watches will require a 2mm hole, whereas a movement with a fourth hand (alarm or second time zone) might require a 2.5mm hole. Both are readily available as leather punches, although these are remarkably dull and will not cut paper cleanly as-is. They are easily sharpened by chucking the punch into a drill and then using first a file, and then fine emery cloth, to reduce the outside diameter near the tip until the edge is sharp.
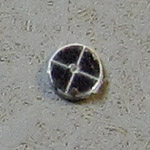
I’ve found that the easiest way to punch the hole is using a drill press to hold the punch. The artwork is then placed on a hardwood block and the punch lowered until it is almost touching. This allows the punch and artwork to be viewed from all sides to ensure it is centered before pressing down to punch the hole. The proof of a perfectly punched hole is a perfectly centered alignment cross-hair in the punched out piece.
The artwork is attached to the dial blank with adhesive. I considered a number of possibilities, but settled on T-88 marine epoxy. This is thinner than typical hardware store epoxy, is easy to apply in a very thin layer, has a working time of at least 30 minutes, will not cause the photo paper to swell, and remains slightly flexible once cured. I also use this epoxy for other non-watch projects, so had plenty on hand. If this isn’t readily available, hardware store epoxy will do, but stay away from the 5-minute variety as this cures too fast and becomes brittle.
- Orient dial with a very thin even coat of T-88 epoxy.
- The artwork in place on the dial, aligned with the marks on the block.
I first placed a piece of wax paper on the dial holding block so that any epoxy that oozed through the holes that originally kept the indices aligned wouldn’t glue the dial to the block. Next, I mixed up a small batch of epoxy (about two drops of each part), and applied a little to the dial blank. A small piece of card stock was used to spread it around, evenly and thinly. I stayed about a millimetre away from the centre hole as I did not want to glue the dial to the brass tube either.
Once the brass was evenly coated, I carefully lowered the artwork onto it. The central brass tube ensured the artwork would be perfectly centered. Because of the long working time of the epoxy, I could take my time making sure that the dial was aligned correctly. Uncured epoxy has the consistency of liquid honey, so it’s very easy to rotate the artwork back and forth, being careful not to touch the part of the dial that will be visible (especially not after invariably getting a bit of epoxy on one’s fingers).
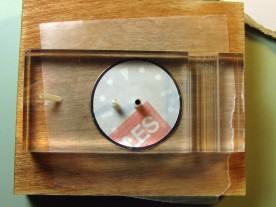
When I was happy with the alignment, it was time to clamp the artwork in place until the epoxy cured. I used a block of clear plastic into which I had drilled a 2mm hole to fit over the central brass tube. To protect the dial surface, a piece of adhesive label backing, cut into a circle slightly smaller than the dial, was placed between the dial and plastic. Using the clear plastic and circular label backing leaves the alignment marks visible to check the artwork isn’t inadvertantly rotated while clamping.
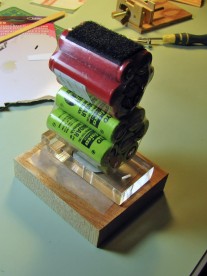
The word “clamping” is a bit of an overstatement. Epoxy requires only enough clamping pressure to keep the parts being glued in proper contact. Any more pressure will just squeeze the epoxy out of the joint. To apply this pressure, I placed a few small battery packs (from my electric model airplane days) on top of the block, being careful to centre them so the pressure would be even. I left this overnight to cure.
Things That Go Bump in the Night
If you examine the photo of the plastic block above carefully, you’ll notice there’s a second hole about 10mm to the left of the central hole, and that this hole falls roughly between the 9 and 10 o’clock markers on the dial. Well, that hole had a barely noticeable ridge around it, which impressed itself into the photo paper as the dial cured overnight, creating a dimple and ruining an otherwise perfect finish.
I decided to try to salvage the dial by carefully sanding the finish, first with 2000 grit sandpaper, followed by 12000 grit MicroMesh. As I started to sand through the lacquer at the edges of the dial, I sprayed on new coats of lacquer, let them dry, and sanded some more.
- The low spot is even more apparent after preliminary sanding with 2000 grit sandpaper.
- After a few iterations of sanding and relacquering, the dimple is getting smaller.
After a few iterations of this, I concluded I’d never completely get rid of the bump, and that it would remain plainly visible if I stuck with my original plan of having a glossy finish. I decided to carry on with the dial as-is, and then apply a matte finish to hide the bump. I’m happy to report that this made the bump completely invisible.
Needless to say, I learned from this mistake. When I made the dial for the Evolution, I made sure that the plastic block was completely flat. Instead of decal backing paper, I used a piece of plastic vapour barrier material, this being both thicker and softer. No bumps appeared in the Evolution dial.
Making and Applying Luminous Indices
The traditional way to make luminous indices is to paint the luminous compound onto the printed indices. This requires a very fine brush, a steady hand, and a lot of patience. I’m lucky to have all of those, but I decided to try a different approach, because one drawback of painted-on lume is that one mistake can ruin the entire dial.
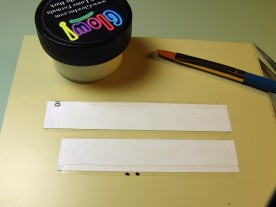
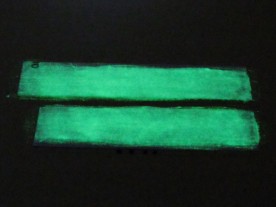
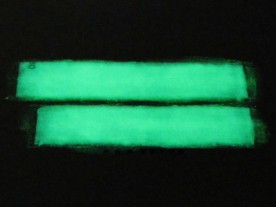
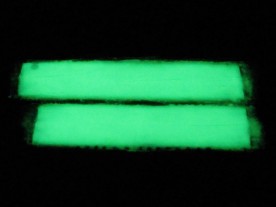
The technique I used involves cutting the indices out of self adhesive luminous material. For the Adventurer, I made this myself by painting many coats of luminous paint (Glow Inc.’s water based Watch Lume Formula) on a piece of inkjet label. The label backing sheet was attached to a smooth block of wood using thin double-sided tape.
- Two strips of adhesive label, and a jar of water-based luminous paint.
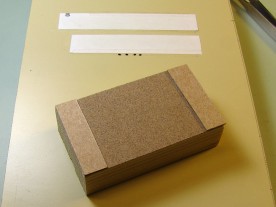
- This sanding block was used between coats to ensure a level result.
After each coat of paint, I would sand off the high spots (that paint, although very luminous, is somewhat lumpy) before appying the next coat. I used a sanding block with pieces of thick card stock glued to each end to ensure I was sanding the paint to a precise level. I also checked the uniformity of the glow after sanding each coat, as this made it easier to see where more paint was needed.
- Two coats of paint have been applied.
- Five coats.
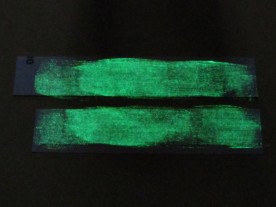
After 14 coats, the result was a thick sheet of perfectly smooth lume with adhesive on the back.
- There are still dark areas after nine coats.
- After fourteen coats, the brightness is uniform.
Instead of this home-made luminous material, I used commercially available luminous tape (Jessup #7550) to make the indices for the Evolution.
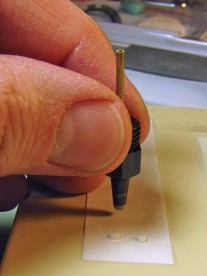
Whether using home-made lume or the commercial product, the steps for making the individual indices are the same. The round indices of the Adventurer dial were punched out using the same sharpened 2mm leather punch that I used for the dial centre hole. Before doing this, I thoroughly cleaned the inside and outside of the punch with a toothpick so that the indices would not be contaminated. I punched the indices by hand, pressing hard enough to cut through the lume and the paper label material, but not the label backing. After punching out each index, I used a small brass tube to push it out of the punch and onto another piece of label backing material.
- Using the punch to cut circular luminous indices.
- Transferring the indices to a piece of label backing.
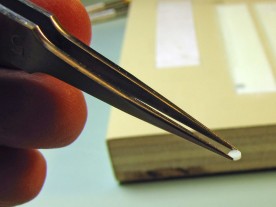
Each index was applied to the dial using a pair of watchmaker’s tweezers. The luminous material is quite soft, so I had to be careful to not deform the indices as I carried them with the tweezers. After each index was placed on the dial, I carefully checked that it was centered in the printed index, and then pressed down on it using the flat surface of the back of the tweezers to ensure a good bond.
- Each index was carefully transferred to the dial with tweezers.
- The index was placed in position, checked for alignment, and then lightly pressed down.
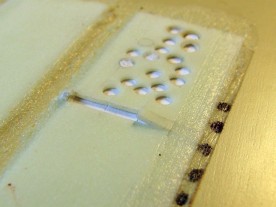
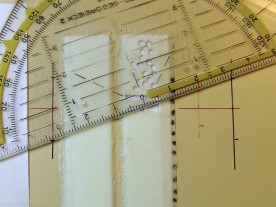
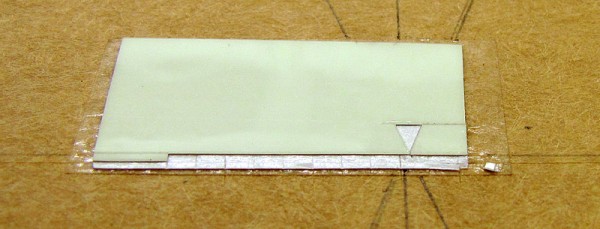
The rectangular indices were made by first cutting two parallel lines to make a strip of the right width, and then cutting this into pieces of the appropriate length. To make the triangular indices, I marked the wooden block holding the luminous material at four points, defining two lines that crossed over at the correct angle (since the artwork was generated mathematically, it was easy to determine the spacing of these points using the concept of similar triangles). Once a properly pointed wedge had been cut, I cut this to the correct length.
- The rectangles were cut from a single strip.
- Laying out the triangular index.
Here are some photos of the Adventurer dial after all the indices were applied:
- All the indices applied, ready for final finishing.
- The glow is apparent with the lights dimmed.
The Evolution dial’s indices were cut and applied in the same way as the Adventurer’s rectangular and triangular indices, except they were cut from commercially available tape. Like the modern Rolex Explorer (14270 and newer), the 3, 6, and 9 o’clock numerals are non-luminous, as cutting those from the rather thick tape would have been very hard to do accurately.
Final Finishing
Because of the dimple introduced during clamping, the Adventurer dial was to receive a matte finish, and I decided to apply this after the indices were in place. This would have the extra benefit of sealing the edges of the indices to the dial. I used Krylon UV-Resistant Matte acrylic lacquer for this final finish, applying many light coats (about 20) until the dimple at 9:30 was no longer visible. Before each coat, I carefully inspected the dial for dust specks, and used canned compressed air and Rodico watchmaker’s putty to make sure it was perfectly clean. Any trapped dust particles at this point would almost certainly have resulted in needing to start over from the beginning.
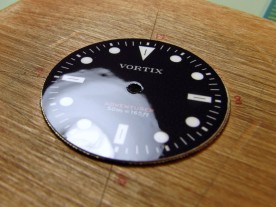
The photo shows the dial after the last matte coat was dry. If you look very carefully, the dimple can still be seen as a very subtle difference in texture, but it is completely unnoticeable, even if you know where to look, in the completed watch. It was difficult to even get it to show up in the photo.
Unfortunately, I neglected to take any photographs of the Evolution dial after the indices were applied, but it looked approximately the same, except with a high-gloss finish. Unlike the Adventurer dial, no lacquer was applied after the indices, as it would not have been possible to polish the finish afterwards. The adhesive on the commerical luminous tape was also much stronger than that of the home-made lume, so I was less worried about needing to seal the indices.
Dial Spacing Issues
With the dial completed, the watch was almost ready for reassembly. One last issue to address was hand clearance and movement installation depth.
A drawback of applying a photo paper facia to an existing dial blank is that the resulting dial will be significantly thicker than the original dial with its thinly applied lacquer-only finish. For example, the dial of the Alpha Explorer was 0.42mm thick (not including the applied indices). After stripping the original finish, this decreased to 0.37mm, but after applying the new artwork, the finished dial was 0.68mm thick, which is 0.26mm thicker than the original dial.
A quarter millimetre (1/100th of an inch) may not sound like a lot, but on the scale of a watch, it is. There is no longer enough height available to install the hour hand without it dragging on the dial, and the misalignment of the movement with the crown tube in the case would make the crown difficult or impossible to operate, and also compromise its water resistance.
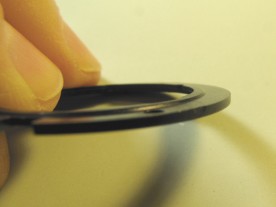
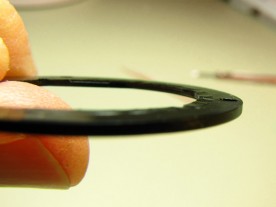
Fortunately, there was an easy fix for both the Adventurer and Evolution. The movements in both watches were originally installed with a spacer ring between the movement and dial. The Orient used a plastic ring with a ridge to provide proper spacing, which I was able to shave off using a hobby knife.
- The raised inner ridge of the Orient’s spacer ring provided proper spacing for the stock dial.
- After removing this ridge by shaving it off, the dial spacing was correct for the modified dial.
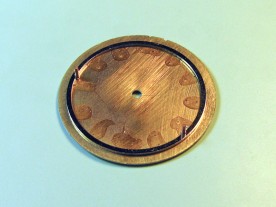
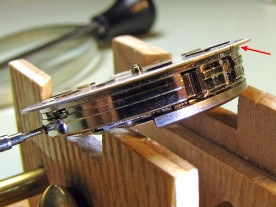
The Alpha’s dial was separated from the movement by a thin brass ring, 0.57mm thick. By reducing the thickness of this ring to 0.31mm, the back of the dial was brought 0.26mm closer to the movement, thus restoring the original hand clearance and movement alignment.
- The Alpha’s brass dial spacing ring was originally 0.57mm thick.
- Shown here is the stock ring and stock dial.
To reduce the thickness, I first attached the ring to a block of wood using double-sided carpet tape. I then measured the thickness of the entire assembly (wood, tape, and ring) at various points. I sanded the ring using another block of wood faced with fine emery cloth, periodically measuring the thickness. When it had been reduced by 0.26mm at all points on the ring, I removed the ring from the tape, and used some 600 grit sandpaper to sand off the burr that had formed on the inside and outside edges. Lastly, I thoroughly cleaned the ring to ensure no loose brass filings would find their way into the movement.
Watch Reassembly
At this point, everything is done, and the watch is ready for reassembly. This proceeds the same way as usual, first fastening the dial to the movement ensuring that it is seated all the way before tightening the dial foot screws. The hands come next, starting with the hour hand. Although the photo paper dials are fairly robust, the finish is more delicate than that of a factory made dial. Everything should be done with extra care to avoid damaging the dial surface. For example, even a slip with a plastic-tipped hand setter could scratch or dent the dial.
During reassembly, pay careful attention to hand clearance. Although the dial-to-hand clearance should now be as it was originally, there is always the potential for hands to interfere with the indices if the new indices are larger or thicker than the old ones, or the new hands (if they were replaced) are longer.
- The hour hand would interfere with the 12 o’clock index if either were any longer.
- Dial and hands installed, ready to be installed in the case.
Once everything is correct, the movement can be reinstalled in the case. Carefully inspect the dial, hands, inside of the crystal, and the rehaut (the visible part of the watch case between the crystal and the dial) for dust, fibres, and smudges. Rodico putty is your friend here, letting you remove such contamination without danger of scratching something. Personally, I always dread the reassembly step, because I always end up repeating it three or four times before I stop finding yet another dust speck right after I’ve closed up the watch. But in the end, it’s all worth it!
Conclusion
A custom dial is the next logical step after modding a few watches using stock aftermarket dials. Today’s printers and photo paper make it possible for the hobbyist to produce an acceptable one-of-a-kind dial fairly easily. Great care must be taken to ensure one ends up with a satisfactory result, but that is true of every facet of watchmaking. The end product can be as good as your patience allows.
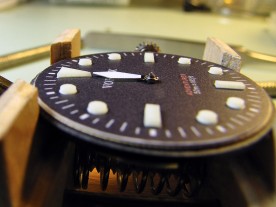
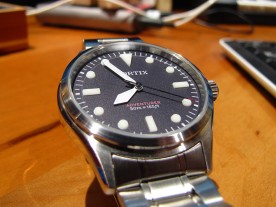
- Texture on the “Adventurer” dial.
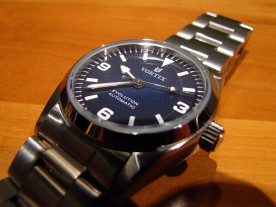
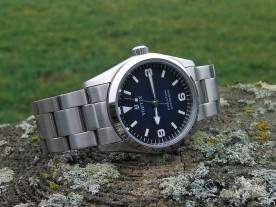
- The “Evolution” has a glossy dial.
- The thickness of the lume is apparent here.
- Hands and indices up close.
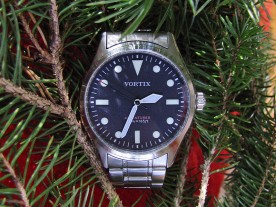
- Christmas time.
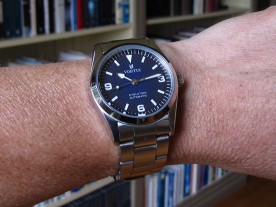
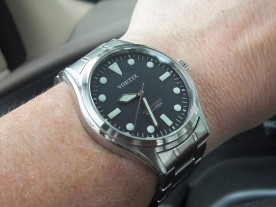
- Library wrist shot.
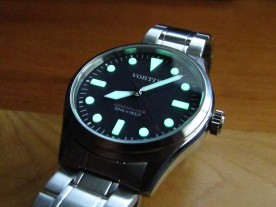
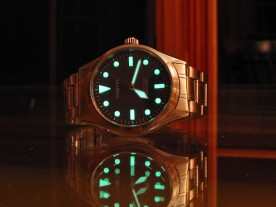
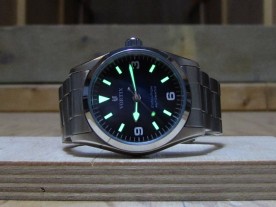
- The heavy lume is very bright.
- The 3, 6, and 9 don’t glow on this one.
- At the wheel (stopped of course).
- On a cool October morning.
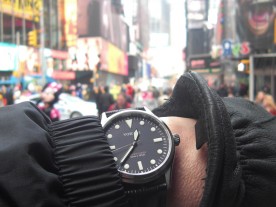
- Checking the time in Times Square.
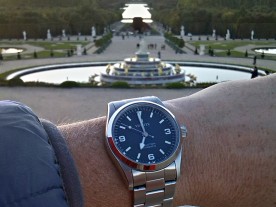
- At the Gardens of Versailles.
Addendum April 2019: A Problem While Servicing
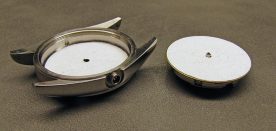
Three and a half years after building the Evolution (one of the two watches featured above), I discovered a shortcoming of the dial-making method described herein. I had decided to replace the mineral crystal with a sapphire one, and possibly service the movement while I had the watch apart. Unfortunately, things did not go as planned:
When I attempted to remove the movement from the case, I found that it was stuck. I assumed that the dial, which has a varnish finish, was slightly stuck to the case, so I pried the movement up carefully. Well, the dial didn’t separate from the case … it separated from itself!
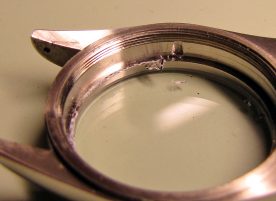
It seems that the varnish was not quite cured when I assembled the watch, and that 3½ years of pressure firmly glued it to the inside of the case.
- I had to scrape the paper and varnish residue from the inside of the case.
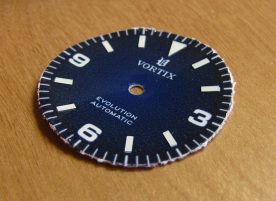
- This is all that remained of the dial after removing it from the watch.
Fortunately, I made a few extra dial prints at the time I originally built the watch, so I have to assemble a new dial to bring it back to life, although I may take the opportunity to experiment with different dial-making techniques. Watch this space for updates …
Related Articles
If you've found this article useful, you may also be interested in:
- Building a Musical Sunrise Quartz Alarm Clock
- Why Negative LCDs Are So Hard to Read
- A Riff on a Russian Navigator’s Watch
- Turn a NATO Strap into a Two Piece Watch Strap
- Restoring a Mechanical Russian Alarm Watch
- Repairing a Scratched Acrylic Watch Crystal

If you've found this article useful, consider leaving a donation in Stefan's memory to help support stefanv.com
Disclaimer: Although every effort has been made to ensure accuracy and reliability, the information on this web page is presented without warranty of any kind, and Stefan Vorkoetter assumes no liability for direct or consequential damages caused by its use. It is up to you, the reader, to determine the suitability of, and assume responsibility for, the use of this information. Links to Amazon.com merchandise are provided in association with Amazon.com. Links to eBay searches are provided in association with the eBay partner network.
Copyright: All materials on this web site, including the text, images, and mark-up, are Copyright © 2025 by Stefan Vorkoetter unless otherwise noted. All rights reserved. Unauthorized duplication prohibited. You may link to this site or pages within it, but you may not link directly to images on this site, and you may not copy any material from this site to another web site or other publication without express written permission. You may make copies for your own personal use.





kherova
October 28, 2015
Very nice. Appreciate the writeup. Gives me confidence to give it a try.
Edwinek
January 20, 2016
Thanks a lot. I’m contemplating making my own watch face myself, this really helps.
Mike Mendler
February 02, 2016
Yo Stefan, Good buddy, pal. I have fallen in love with a watch very similar to your Adventurer and the dial is not available. If you google “Seiko 5 Fleiger Type A ?? you will get the photo, the one on the left. Will be obvious. This is a SKX809. You are my only hope. Only you can understand my plight. Any chance you could or would build this? Thanks, Mike
Stefan Vorkoetter
February 02, 2016
Well, I probably could build this, but I don’t really have the time to do so right now. Nothing from Dagaz or Yobokies is close enough? You could even buy a sterile dial from Raffles, cut off the dial feet, and use dial dots to attach it to the Seiko movement.
Mike Mendler
February 02, 2016
Stefan, Dagaz and Yobokies didn’t pan out. I’ll check with Raffles , he has one that very close. 29mm. The 809 takes a 28.5mm. I’ll explore the option with him. Thanks
John
May 04, 2016
Hey, I used the info on this page to attempt a custom face mod of my own. If interested in seeing the results, drop me a line.
redzebra
May 21, 2016
It’s all in the details…thank you for going into details in your description. You pointed out several areas I should be mindful of in my dial project. As this page came up from a google search I recalled having been to your site before and reading about your Black Lagoon project.
Please continue making this type of tutorials. You have the gratitude of those who posted here and I am sure many many more who have not done so. Thank you.
Megat
May 25, 2016
Thank you Sir! This articles and your writings were invaluable.
aliut
June 04, 2016
Just wanted to say that this has to be one of the best write-ups I’ve seen on the internet. Thanks for taking the time to explain everything so clearly. Even though I might not necessarily try to make a custon watch dial in the future, I constantly undertake projects that will benefit from the information you provided here.
Matt
June 25, 2016
Stefan,
Would you be able/willing or know any watch aficionados that would make a custom watch face for some deployed pilots? We have been building watches a bit and are interested in a custom squadron design, but having difficulty finding someone with the know how. Thanks for the write up!–When I get home I’ll have to take a crack at this. Shoot me an email if you get a chance! Thanks!
Matt
Rob
July 06, 2016
Hello!
I have a Parnis sterile dial 40mm submariner.
It has date window and cyclops.
I am having a HELL of a time finding a dial to fit that says Rolex and submariner.
I tried with Raffles and he doesn’t think the date windows would line up.
Are you able to print on this dial?
Stefan Vorkoetter
July 06, 2016
Why would you want to print Rolex on the dial? That would make it a counterfeit.
Kevin Altman
July 19, 2016
Does anyone know where I can purchase a custom dial and hands for a watch?
Jeffrey Elgas
August 09, 2016
This is one of the coolest things I have ever seen in the world of watch modding. I’m so jealous of your diligence and precision. Bravo.
watch user
October 15, 2016
Very impressive. Thanks for sharing.
JSatle
October 21, 2016
Stefan, how wonderful!
I am having a problem though of a different kind.
I have a chinese “Rolex” Explorer I. I like the design very much of course, but would like to remove the ROLEX brand mark and possibly replace it with something else.
Is there a way to do it without taking all the steps you so beautifully described above?
Best, JS
Stefan Vorkoetter
October 22, 2016
If the dial has a glossy finish, you may be able to remove the writing using acetone, applied and wiped with a toothpick. However, there is the possibility that this could ruin the finish of the dial itself. I’ve heard of people using Goof-Off for this sort of thing too.
William
October 23, 2016
Hi Stefan
I don’t know if your talent is for sale 😉
Could you Mod a U-1001 dial from Uboat?
uday
October 30, 2016
What is the paper you used for printing. Glossy paper will be thin right?
Stefan Vorkoetter
October 31, 2016
HP Premium Plus Photo Paper. It’s the same thickness as photos you’d get printed commercially.
Suleman Qureshi
December 24, 2016
I would like to repaint an IWC 3500 date disc. Actually, I have received a watch for repair from a valuable client and the date disc has been discolored slightly.
Basically, it’s an ETA 2892 (Old Version) caliber but IWC has slightly modified the date disc from 3 o/c crown to 4 o/c crown side.
Is there any possibility that I can send this date disc for to repaint?
Thanks
Stefan Vorkoetter
December 27, 2016
I’m not sure I’d want to tackle a part from such a valuable watch. If I were to try it, I would probably print a new date ring on decal material, and apply that over what is already there. However, the quality would be nowhere near as good as a professionally printed date ring, and there is the possibility that the ring would end up being too thick.
Ash
January 15, 2017
10 out of 10 for a great presentation and stunning results to your hard work.
Whats your take on the old Omega dials as they do not seem to age well. The kinda status they have one would have thought that they could stand the test of time lol. I have a highly prized Citizen watch that needs your kinda tlc. If interested let me know.
Kind regards
Ash
Stefan Vorkoetter
January 15, 2017
I don’t have any experience with vintage Omega dials. The only vintage dials I’ve ever worked with are Vostok, and they’ve help up quite well, being no worse than they were when new. 🙂
Barn
February 10, 2017
Hi Stefan, fantastic write up. I’m going to get a Parnis 40mm ‘Explorer’ or ‘Milgauss’ and you’ve inspired me to try making a dial to personalise the watch a bit.
Then again, perhaps the Smiths Everest (PRS-25) from Timefactors might be a viable option now. It was only the dial and hands putting me off ☺
Chris
February 28, 2017
I’m seeing a lot of seiko 7002 watches with Mickey Mouse dials but haven’t been able to find a source for the dials. Do you have any idea where I could find something like that? None of the links you provided seemed to have anything.
Stefan Vorkoetter
March 01, 2017
I’m not aware of any source, but perhaps another reader is.
Lang
March 19, 2017
Hi, I came across your website while searching for “Watch Face Printer”. You seem knowledgeable about watches and printing.
I wanted to know how I can put a photo on a watch. Wasn’t to familiar with how watches work. I want a simple way to open the face, print the image and set it on the watch face in a professional manner.
I can send a generous donation / consulting fee of $100 if you can explain to me an easy way to do this.
Please get back to me as soon as possible if this of particular interest to you.
Thanks Sincerely,
Lang
Stefan Vorkoetter
March 23, 2017
You can do it the same way I’ve described in this article, but using a photo instead of custom artwork. You may need to modify the movement or movement holder so the hands clear the photo.
Handavinci
April 10, 2017
Just wanna say thanks man, this article and your topics on WUS has given me the confidence to make my own dial.
Just finished the dial holding block and the design in adobe illustrator. Got the tools on the way and can’t wait to continue!
Richard
May 01, 2017
Hi Stefan,
Is there any way you’d make the dial generator public? I’ve been playing around with writing one in Python but never really finished it. Would be fun to try and design and print a few dials at home.
Stefan Vorkoetter
May 01, 2017
The dial generator is just a piece of code I wrote to generate this particular dial. It’s not a general-purpose dial generator (although I’ve thought of writing one). Also, it’s written in the Maple language, so unless you have Maple, it’s not going to be much use.
Kirk Thor
May 19, 2017
Do you make custom dials for Omega watches. I would like one for the Omega Seamaster Planet Ocean 600M GMT GoodPlanet (43.5mm) 232.30.44.22.03.001. I want a dial without the date window, and a 3 in it’s place. Let me know if you can do it. Thanks, Kirk
Stefan Vorkoetter
May 20, 2017
No, sorry, I don’t make custom dials for others. And even if I were to make a replacement dial for an Omega Seamaster, I doubt the quality would be nearly as good as the original you are replacing.
marty mehrdad
June 15, 2017
nice job, do you do any for pay? If so I would be interested in having you do a project for me. If not, do you know of any person / places that do this for commercial profit? tnx. marty
marty mehrdad
June 15, 2017
Sorry, got my answer on your doing it, any sources?
Kevin Altman
July 15, 2017
Do you make watches to order? I would love to be able to order a watch with the exact specifications that I want.
Stefan Vorkoetter
July 15, 2017
No, sorry, I don’t.
Mike
August 10, 2017
This is great! Any thoughts on how to do this for a dial with recessed layer for subdials?
Stefan Vorkoetter
August 10, 2017
I’ve been giving that some thought, but haven’t come up with anything I’m happy with yet.
Mike
August 10, 2017
Could you do multiple layers of the photo paper, with laywr one having the design for the sub dial, and layer two the design for the main dial with a cut out for the sub? Or have you tried that and had no success? Really love the tutorial btw
Stefan Vorkoetter
August 11, 2017
I haven’t tried it, but I think the photo paper would be too thick. Sub-dial hand spacing is usually extremely close. Probably only dials based on water-transfer decals would work for chronos.
San
September 19, 2017
Hello Stefan,
Would you be willing to share the vector file of the adventurer dial you created? I’m looking to print one that is very similar. I’m just starting out with vector files and I feel your dial would give me a great head start. Honestly, I need the help, haha… From one avguy to another, I appreciate any assistance you can give. Thank you!
Stefan Vorkoetter
September 19, 2017
Hi San. I’d share the vector file, but there isn’t one. The artwork for the dial was generated by a Maple program as a TIFF (bitmap) at a resolution corresponding the printer’s maximum resolution.
Thomas Jasperson
September 26, 2017
Wow……All I can say is Wow!!!! What an amazing job you did, I am so blown away by the craftsmanship, detail and utter perfection that went in do the design and crafting of your custom dial. Besides the top notch workmanship your write up, bullet points and pictures makes this even more awesome! You sir are a DIY’ers dream! Thank you so much for taking the time(people think it was time consuming building your dial have no idea how much time went into showing us on this webpage!) to construct such a great step by step to help us all out. I feel guilty sometimes seeing such nice diy articles on how to projects because I use them all the time for my projects but never take the time to make any myself! I truly feel bad after seeing yours that I think next time I take on a project, I will remember what you did and how much I appreciated it and make one myself. You have not only amazed me but you have inspired me to do the same next time I take on a project. After all, its only fair that I contribute after getting so much help from yourself and others that make videos and web pages using their own precious time to be helpful to the rest of us! Thank you so much.
ron sharp
December 22, 2017
Very nice presentation..
well done!!!
Heikki
January 22, 2018
Warm thank you for this post!
Would you care to share where did you get the Rolex style bracelet?
Stefan Vorkoetter
January 22, 2018
The bracelet is from an Invicta 8926OB, but using the end links that came with the Alpha Explorer.
akron
January 23, 2018
hi,
i’m looking for a watch case for eta 2824-2 like vortix adventurer in 38,39 or 40mm. do you know where i can find something?
where can i buy vortix watches?
best regards
sinan
Stefan Vorkoetter
January 23, 2018
Sorry, I don’t know where to find such a case. Vortix watches are not available for sale.
Daniele
January 24, 2018
Hi Stefan,
can I have a contact to write to oder a custom dial?
Thanks
Daniele
Stefan Vorkoetter
January 24, 2018
Sorry, I do not make custom dials for sale.
Anthony
February 02, 2018
This was a very helpful guide! Thank you for your hard work on this. I’m playing with some watch customization right now and printing my own dial seems to be the next step. Question for you… What would be the downside of not fixing the new printed dial onto the original dial? I just took an old Seiko SNK and printed a new dial for it for my son. Not nearly the detail that you have done here, but it works. I didn’t want to scrap the original dial just yet, so I simply cut it out and put a little adhesive on the ring around the movement and it stuck down just fine. I’m honestly not sure there would be any visual difference to doing it this way when I make my real dial. And I wouldn’t have to worry about the hands clearance issue (which is something I hadn’t even considered until you mentioned it). Just curious what your thoughts are to skipping the dial and just putting down the printed dial.
Stefan Vorkoetter
February 02, 2018
In many watches, the dial is part of what holds the movement in place. The caseback presses the movement and dial as a unit against the inside of the rehaut. If the dial is made of something too flimsy, the movement may not be securely held in place.
Pino
February 14, 2018
I’d like to know if you can share the code that you use to generate the artwork for the dial with Maple
Thanks
Stefan Vorkoetter
February 15, 2018
The dial was generated with code that only works in as yet unreleased version of Maple. I will share it as soon as that version is released.
Cee
February 21, 2018
I have a question, I have a Borealis watch that got water inside the watch and ruined the dial. I still have the dial which I completely took the remaining paint off. The size is 31MM and made for a Seiko 4R35. Tried to to source a new dial from Borealis with no luck. The Lume is still on the dial, I was thinking is it possible to paint the dial the same or near same color with model spray paint after removing the lume. The original finish was like a matt finish and a blue medium, at this point I’d take a dark blue in a matt finish. What would you recommend, thanks in advance, the watch is the Borealis Sea Hawk in blue if you want or any one wanted to a search and check it out.
Stefan Vorkoetter
February 21, 2018
You might consider buying a similar dial from Dagaz Watches. Their dials are smaller (28.5mm), but as long as that’s more than the size of the rehaut opening, it should work.
Orville
March 06, 2018
Nice work. A lot of time needed for this job. The thickness has me a bit concerned, so I’ll do my project using slide-type decal transfer material. I started my watch repair journey using inexpensive movements (Elgin 55x series) and in order to get the movements cheap, I had to settle for dials that would absolutely need to be restored. So now I am surrounded by vintage cases, bands, working movements and original hardware but crap dials. So now I’ll make up the “Orville” watch using Elgin movements with custom dials. They’ll be cool gifts. Thanks for posting this method. You really did a nice job!
Steven D Larson
March 17, 2018
Awesome ! Now I have Confidence that I can make my own custom dials.
Thank You
Mark
April 22, 2018
This was really inspiring. Well done!
Cassio Siqueira
May 14, 2018
Tons of very good ideas, hope to put them in practice soon.
Thank you so much for sharing 🙂
Izzy
June 11, 2018
Cool project, like the result very much!
I need some help with printing my own design, i can’t seem to find the right way to get a sharp highly detailed print. Anyone who can help me? Would be very much appreciated!
Gary
September 18, 2018
are you able to restore seiko dial?
Stefan Vorkoetter
September 18, 2018
I’ve never tried restoring a dial. That’s probably more difficult than making a custom one.
JC
October 09, 2018
Hello. For those that are interested in personalized custom dials you can contact me. Thank you. Great presentation
Stefan Vorkoetter
October 09, 2018
Thanks. The watches on your site all look very large, and very quartz. 🙂
PequeñoSer
January 02, 2019
Awesome!
Stuart
January 23, 2019
Hi there. Fantastic job, and thanks for sharing your experience with us all….
I was wondering about the 2 versions of luminescence you used (the Jessup Tape and the Glow inc. paint). Which one lasts longer? is brighter? Is the better way to go?
And also, after 3 years, how have they held up? Do they still look as professional as they do in the pictures above?
Stefan Vorkoetter
January 23, 2019
The Glow Inc paint is brighter, but only because of the way I made the lume (14 coats of paint). When applied in “normal” quantities, it’s not as bright as the tape. Both watches are still legible after 8 hours in the dark (with dark adapted eyes).
They’ve held up well. There’s no degradation of the dials that I can perceive, and I’m pretty picky. There are some scratches on the crystal of the Evolution since it’s my daily wearer, but I’ve ordered a sapphire replacement for it.
Eugene
March 01, 2019
How did you come up with the name “Vortix”?
Stefan Vorkoetter
March 01, 2019
The first three letters of my last name, and the sound a watch makes.
Dr James Hood
March 11, 2019
Hi Stefan,
I have a genuine Tag Heuer F1 Indy 500 CAC111B.BA0850 with damaged sub dials. I cannot find transfers or stickers to put on the damaged sub dials before I reassemble this (my printer isn’t good either). Could somebody be able to print these off for me? I am willing to pay for this.
Kind regards,
Jim.
Stefan Vorkoetter
March 11, 2019
I took a look at that watch on-line, and I don’t think you’re going to be able to make passable subdials for it using the techniques I describe here. There are two problems. One is that there is usually not enough clearance between the dial and hands to add any thickness to a subdial. The other is that the subdials on that watch are shiny metallic, and there’s no way to print that. What sort of damage is there to the subdials?
Morten Klausen
March 25, 2019
Can you share the code you used? Or do you know where I can find similar codes, for inspiration?
Stefan Vorkoetter
March 30, 2019
I’ll try to clean it up and add it to this article.
Jason
April 13, 2019
Inspiring. Thanks for posting. It’s a lot of work to make one, but making a limited number for gifts would be a great idea too!
Jim Jones
May 10, 2019
I am trying to write very small text on the bottom or near the 6:00 position on a dial that already has markers and indices etc. it is a waffle print dial. Any easy way to do this?
Stefan Vorkoetter
May 10, 2019
Jim, it depends. 🙂 If the dial is light in colour and you want dark text, you can probably make a waterslide decal. If the dial is dark and you want light text, all I can think of would be very careful work with some paint and a very sharp needle.
Edward
May 17, 2019
Stefan,
Is it possible to add a word to a watch dial you like but want to modify? A watch I own has nothing on the lower half of the dial and I can envision adding one word that would complete the dial.
Stefan Vorkoetter
May 20, 2019
As I responded to Jim above, it should be possible to add a word if the dial is light and the text is to be dark.
Trent
May 21, 2019
Stefan,
This is all great information! Thank you very for sharing what you have learned. I know it takes a lot of time and effort to maintain sites such as this.
Did you ever consider/try pouring the glow paint to the desired thickness with in a perimeter (made of something such as hot glue) as opposed to building up 14 individual layers?
Thanks again!
Stefan Vorkoetter
May 22, 2019
I considered that, but thought it might take weeks or months to dry, since no air could get to the inside once the outside has dried.
Morten Klausen
September 09, 2019
How do you manage to make the text to clear?
When i print it out on (2400 DPI) It looks unclear.
Stefan Vorkoetter
September 09, 2019
It depends a lot on the quality of your printer and the paper you are using. My HP7500 printed sharper than my newer HP7600 for instance.
Kari
December 20, 2019
What size crystal (diameter and thickness) goes into the Chicane? I’m desperately trying to find a sapphire replacement crystal. And thanks for the very interesting read!
Stefan Vorkoetter
December 20, 2019
I never took the crystal out to measure it, but it’ll be around 32.5mm in diameter, and I couldn’t find a sapphire of that size.
DENNIS EDELSTEN
January 23, 2020
Hi Stephan,
Thanks for your detailed dial refinish info. For my watch development project your work(so much)confirmed to not go with a home built dial (have also done some paper ones) . Laser on aluminum has not been good enough quality and am now arranging with a company for photo etching on stainless steel to get 0.05mm resolution.
Regards,Dennis
Dennis
March 04, 2020
I must say I’m impressed! Many people would be afraid to do what you did to that watch. Without experimentation you will NOT get ahead in life. After all isn’t that was life is about? So it didn’t work out perfectly. To be honest it looked much better than I thought it would. The lume and the raised markers looked better than I’ve seen on may commercial watches. I love the raised or embossed look. It gives it a real 3-d look. As far as your watch varnish making the movement stick to the case; that’s to be expected on your first try or even if it isn’t that is amazing well done. I would say with practice you could be a serious player in the aftermarket dial business but that may not be your thing. Still, all-in-all it was very impressive! Bravo!
Stefan Vorkoetter
March 04, 2020
Thanks for the kind words Dennis. Yes indeed, being afraid to try is the biggest obstacle to accomplishing anything. But you’re right, doing aftermarket dials commercially is not something I want to do. Then it becomes work instead of play. 🙂
emanuele croce
June 22, 2020
hello, i’d like to costumize my watch with a skull dial.
i have pictures. is this the right place? it’s a dayjust rolex 41
tks
Stefan Vorkoetter
June 22, 2020
It’s the right place if you want to do it yourself. 🙂 Otherwise, you might have a hard time finding someone who would do that to a Rolex.
Nader Tamannaie
August 25, 2020
Hello,
Can you print the brand name CORNELL on a clean new watch dial? The font needs to be about 0.7 mm high. If you do, how much will it cost, where do I send it and how long before it’s done?
Thank you.
Stefan Vorkoetter
August 26, 2020
No, sorry, I can’t.
Andry Diaz
March 25, 2021
Hello,
Awesome job, I would like to make a custom dial. Do you think I can achieve it with my simple printer: canon pixma mg250S ???
francisco torres
June 07, 2021
i have a 2 seiko bellmatics 27 jewels and im looking for someone that can make new dials one in red metalic and one blue metalic… can you pls let me know and if you can not point me in a direction of who can. thank you
Scott Hudman
August 09, 2021
Very interesting site. I am in the process of designing a set of historic gauge faces for my 1930’s sports car and have discovered the easiest and most accurate software that gives the highest quality result for gauge faces and it would be perfect for watches. It is called GaugeMaster available here:https://www.johncode.com
Only for Apple products at the moment.
Afshin
September 26, 2022
Hello,
I need a new dial for my watch with certain specifications.
I was wondering if you know a person/company who would do that for me.
The companies I found only do wholesale. I’ll be very thankful for advice.
Best
Afshin
Mohd Johan Jamian
October 10, 2023
I understand that you can print custom design sticker for watch dial. I want to change my current dial design to my custom design. Attached is the design of my custom design and the wordings to be use on 28.5mm watch dial.
Mohd Johan Jamian
October 10, 2023
I understand that you can print custom design sticker for 28.5mm watch dial. I want to change my current dial design to my custom design.
Nilay
September 30, 2024
Hey @Stefan Vorkoetter your work is very impressive and highly detailed. I want to buy an alpha explorer for a mod project, but there isn’t a definite answer for the dial size of the watch. Is it 28.5mm? Any help would be appreciated. Thanks