Velocimaster V-33: An Omega Speedmaster X-33 Homage
September 29, 2013
The first time I saw a photo of the Omega Speedmaster X-33 analog-digital watch, I didn’t really like it all that much. At that time, I had just started collecting Russian mechanical watches, and was turning up my nose at the very idea of a quartz watch. But something must have been tickling the back of my mind, because a few days later, I just had to have one.
Sadly, Omega discontinued the X-33 in 2006 after just eight years. Used examples are easily available (and Omega will still service them), but at prices starting around $2000, it was well beyond what I was willing to spend on a watch. So, as is my custom when something I want costs more than I’m willing to spend, I decided I’d make my own.
Starting Point
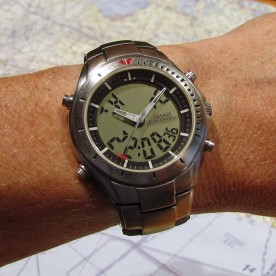
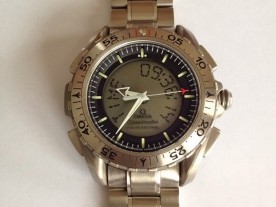
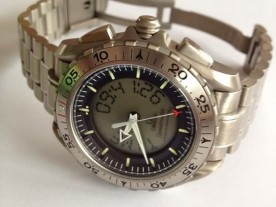
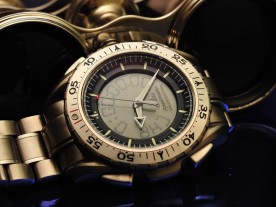
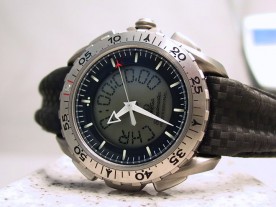
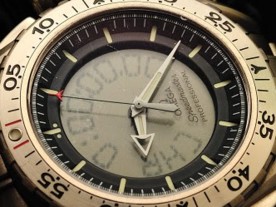
Before beginning this project, I looked at a lot of pictures of the Omega X-33. Here are four, courtesy of Watchuseek forum members avusblue and john wilson:
- Second generation Omega Speedmaster X-33.
- Courtesy of Watchuseek member “avusblue”.
- Second generation Omega Speedmaster X-33.
- Courtesy of Watchuseek member “john wilson”.
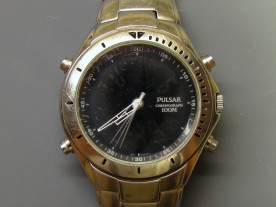
There are many things that make the X-33 what it is, but the defining feature is the circular liquid crystal display with the text curving around it. There were a few watches made with similar displays at the turn of the century, and I was able to track down a Pulsar NX01-X001 on eBay for a good price.
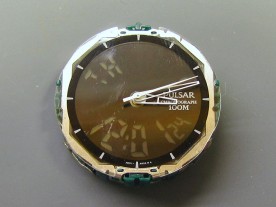
Other than a circular display, there is little that this watch seems to have in common with the Omega at first glance. The case is different, the bezel is different, the chapter ring is different, the hands are different, and the display is a hard-to-read “negative” one (although the NX01 was also available with a regular dark-on-light positive LCD). Furthermore, this particular example was in very bad condition, with many scratches on both the case and the crystal.
Preparing the Case
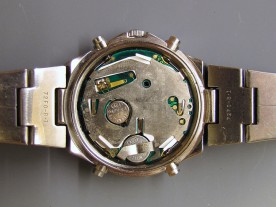
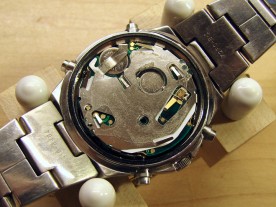
The first order of business was to take the watch apart, remove the crystal, and clean up the case. The case back is screwed on, and was easily removed. A hole in the back of the movement, marked with an arrow, indicated a lever to press to release the stem. After that, the movement just dropped right out.
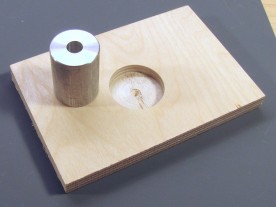
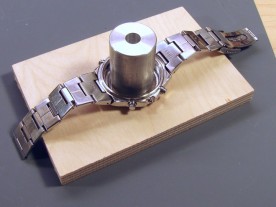
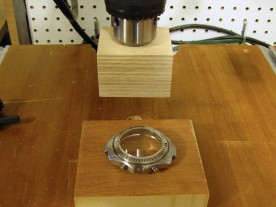
The mineral glass crystal is press-fitted to the case. To remove it, I first drilled a hole in a block of wood to support the case by the fixed bezel, crystal side down. I then used a 1″ diameter aluminum bushing and my drill press to push the crystal out.
- 25mm aluminum bushing and wood block with 32mm hole.
- Ready to push out the crystal on the drill press.
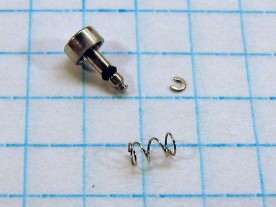
After pushing out the crystal, I carefully removed the four push buttons. Each one is held in place by a very tiny c-clip on the inside of the case, which I removed by pressing down on the open side with the tip of a small screwdriver.
I also considered removing the pusher tubes, which appear to be press fitted into the case and secured with some sort of glue. I was unable to remove this glue, so I left the tubes in places and worked around them.
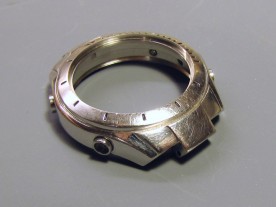
The case originally had a polished finish, but it was quite scratched by the time I acquired this watch. It would have been possible to completely restore the original shine, but I prefer a brushed finish (like that on the X-33’s titanium case and second genration bezel).
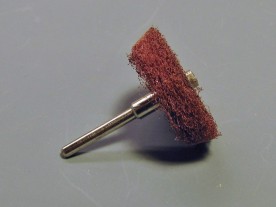
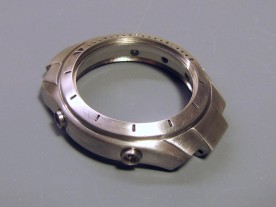
I started by sanding the entire case with a piece of fine emery cloth, sanding circularly around the bezel, lengthwise along the case sides, and crosswise on the lugs. I also brushed the bracelet lengthwise. Once I had most of the scratches out, I switched to discs cut from a Scotchbrite pad, mounted on a Dremel tool. The Scotchbrite was very effective, but wore down quickly, so I went through about a dozen disks.
- Brushing wheel cut from a Scotchbrite pad.
- The case after sanding and brushing.
Once the case had a sufficiently uniform brushed appearance, I repainted the indices on the bezel. These don’t look anything like the arrangement on an X-33 bezel, but I decided to leave them as they were. The only change I made was to paint the 12 o’clock index red instead of black. I used Testors brand paint, in flat black and flat red.
Once the paint was dry, I made one more pass with the Scotchbrite wheel to remove any paint that had made its way out of the indices. I also decided that I’d prefer the lugs to be brushed lengthwise, so I rebrushed them by hand, starting with emery cloth glued to a stick, and then small pieces of Scotchbrite.
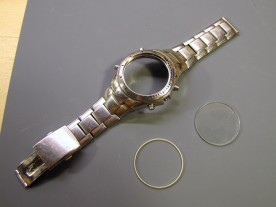
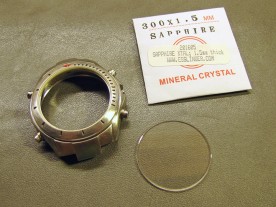
- The scratched mineral glass crystal was replaced with a sapphire one.
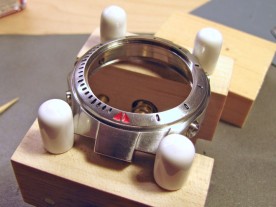
- A drill press and some wooden blocks make a suitable press for flat crystals.
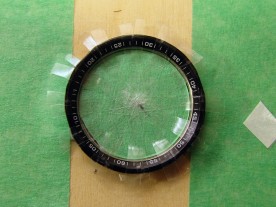
For the replacement crystal, I chose sapphire instead of the original mineral glass, since it is more scratch resistant. The X-33 has a domed crystal, but I stayed with a flat one since I don’t have a crystal press, relying instead on my drill press and some wooden blocks. I reused the original compression ring.
The Display
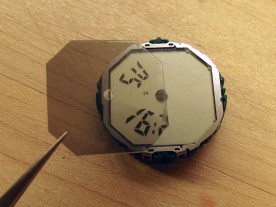
An LCD works by passing light through two polarizing filters that are at right angles to one another. One filter is behind the LCD, between the display and its light source (either reflected ambient light or a backlight on a watch LCD). The polarized light leaving the first filter passes through the display, is rotated 90° by the crystals, and then passes through another filter on the front of the display. To display something, that 90° rotation is switched off by passing a current through parts of the display. Whether it is the blank areas or the displayed digits that are black depends only on the relative orientation of the two filters. Simply rotating the front filter by 90° will invert the display.
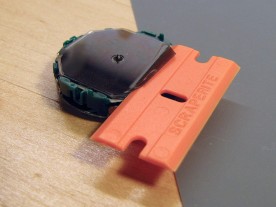
On most watches, the front filter is glued to the LCD glass, making it difficult to remove. Simply prying up one corner and pulling is likely to break the glass. Instead, I very carefully slid a plastic razor blade under the filter, working my way in circles around the display until I got to the middle. I removed some adhesive that remained on the glass with rubbing alcohol.
- I removed the original polarizer using a plastic razor blade.
- Trying out the new filter (still with its protective film in place).
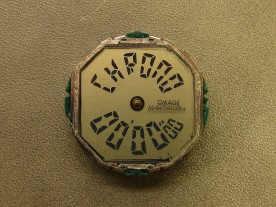
I had planned on using adhesive polarizing film to make the replacement filter, but after several failed attempts to cut one out without contaminating the adhesive with specks of plastic dust, I chose to use a non-adhesive polarizer instead, held in place with a transparent adhesive film on the front of the filter.
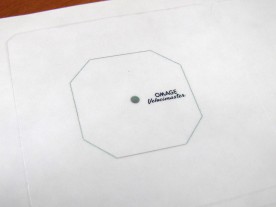
- Logo printed on the transparent overlay which will also hold the filter in place.
- New polarizer installed using the transparent adhesive overlay.
For this film, I used transparent inkjet-printable labels from Laser Inkjet Labels. These are very slightly textured, making them slightly translucent instead of transparent, but at the distances involved, this was unnoticeable. Using a printable film also gave me a way to print a logo onto the display.
Many Hands Make Much Work
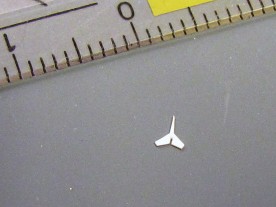
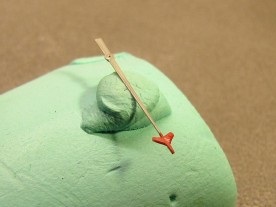
Another iconic feature of the X-33 is the “airplane” second hand with its distinctive red tip. After failing to find such a hand of an appropriate size, I chose to modify the second hand that the watch came with. It took a while to find an appropriate material from which to make the tip, but I finally found some sufficiently thin card stock (about half the thickness of the usual cover stock available in office supply stores).
- “Airplane” tip cut from very thin card stock.
- The tip was glued to the second hand with epoxy.
Cutting out the tip required a very sharp and pointed hobby knife blade, used under 5× magnification. It didn’t turn out perfect, but the miniscule drop of epoxy I used to fasten the tip to the hand filled in all the blemishes.
Once the epoxy had cured, I flipped the hand over and applied some more to the back side. After than had cured, the whole assembly was surprisingly rigid (for something only 13.5mm long and 0.2mm thick). I painted the body of the hand grey, and the airplane tip with the same flat red paint I’d used on the 12 o’clock bezel index.
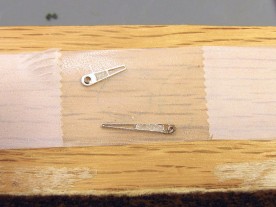
I chose not to use X-33-style hour and minute hands, because I quite liked the look of the hands the Pulsar came with. I did however apply lume to the inner half of each hand. To ensure a smooth upper surface for the lume, I placed each hand face down on some low-tack removable transparent tape, and applied the lume from the back. A final coat of white paint on the back of the lume makes it more effective by reflecting back light that would otherwise escape out of the back.
- Lume was applied with the hands face-down on tape.
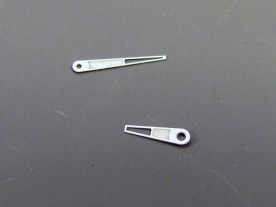
- Completed hour and minute hands.
The resulting hour and minute hands, although unlike those of the X-33, suit the watch quite well. They also remind me a bit of the hands of Omega’s Z-33 Spacemaster.
The Next Chapter
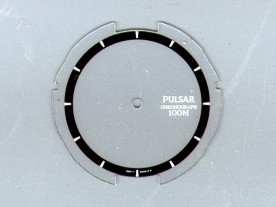
Another must-have feature to achieve the X-33 look is a multi-layered chapter ring. The Pulasr NX01 already came with all the necessary ingredients, just needing a little more spice. The inner chapter ring on the NX01 was simply silkscreened onto the same overlay containing the “Pulsar Chronograph 100m” notation.
Reusing this overlay meant that I did not have to worry about proper alignment, since the existing registration notches (which fit around bumps on the movement) would take care of that. It also meant not needing to find material of the correct thickness from which to make a ring from scratch.
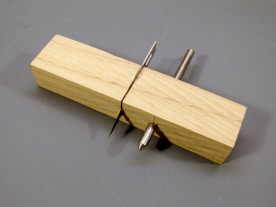
- I fashioned this tool to cut out the clear centre of the overlay.
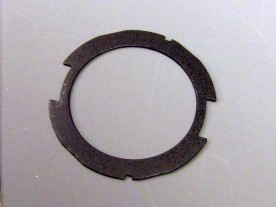
- Overlay with centre removed, and spray painted black.
In order to reuse this, I needed to cut out the inner part of this overlay. I fashioned a cutting tool from a block of hardwood, holding a blade and a pivot. After many light passes, the inner circle popped out almost perfectly cleanly, requiring just some light touch up on the inside of the ring. I gave it a coat of black Testors spray paint, followed by a matte clear coat.
The outer chapter ring of the real X-33 has minute/second markers, and is further subdivided into 1/5 second intervals. This is completely pointless on a quartz movement, since the second hand jumps in one second intervals. I chose not to replicate these marks.
The luminous five-minute markers of the Omega are actually on the inner chapter ring, with the outer ring notched to reveal them. I had considered various ways of reproducing this, all of which involved the danger of ruining the one and only ring that I had.
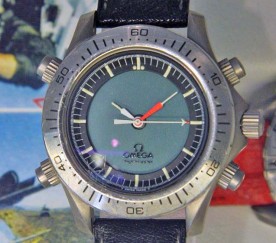
The X-33 prototype chapter ring is not notched. Photo courtesy of Jean-Michel at www.speedmaster-mission.net.
Eventually I decided to apply the five-minute markers on top of both rings. This is not without precedent, as one of Omega’s early prototypes of the X-33 was made in exactly this way, as can be seen in the photo at right, courtesy of Jean-Michel at www.speedmaster-mission.net.
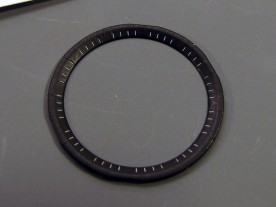
This still left me with the problem of how to remove the numbers from the existing ring. I made a few false starts with a very fine brush and some black paint, but couldn’t get a smooth enough finish, so I wiped the paint off with thinner before it dried.
What I settled on was to mask off the one-minute indices, leaving only the unwanted numbers exposed, and to then apply black Testors spray paint (the droplets laid down by hardware store spray paint would have been too coarse). I applied two coats in quick succession, and then removed the tape before the second coat dried too much, to avoid ridges. Once completely dry, I applied a few coats of Testors dull clear.
- Tape covers everything except the numbers to be blacked out.
- Chapter ring after blacking out numbers and matte coating.
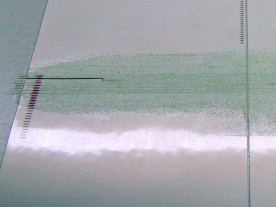
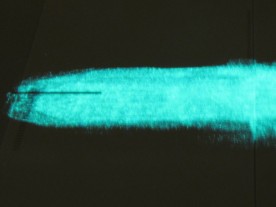
I made the luminous indices from inkjet-printable vinyl label material. I first printed a series of tick marks spaced 0.7mm, and then used a hobby knife and straight edge to cut the label into strips (trying not to cut through the backing sheet). I then painted several coats of Glow Inc. watch lume formula onto the material.
- Vinyl label material cut into strips and coated with lume.
- Lumed labels in the dark.
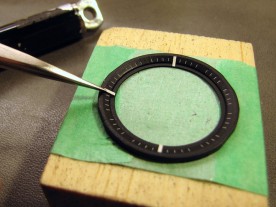
Once dry, I cut through the dried paint, and cut the strips into 2.5mm long pieces. Using a very small amount of glue, I attached the two chapter rings together (using the registration bumps on the movement to assure they were aligned). I then carefully applied the luminous indices to the ring assembly. The adhesive, although permanent, is repositionable for a while, so it was relatively easy to align the indices exactly.
- Applying the self-adhesive hour indices with watchmaker’s tweezers.
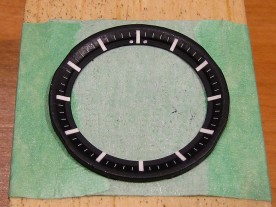
- Completed chapter ring with hour indices and 12 o’clock lume dots.
To make the two luminous dots on either side of the 12 o’clock index, I used a toothpick to first apply a small dot of white paint. Once dry, I used the toothpick to apply lume over the paint. It didn’t turn out perfectly symmetrical, but this is only noticeable under a loupe or in close-up photos.
When it was all done, I applied a final coat of matte clear to give a uniform finish, and help hold everything together.
Reassembly
The first job was to reinstall the four pushbuttons. I applied a thin layer of silicone grease on the tiny o-ring around each button’s shaft so that no water can enter there (although I have my doubts about the claimed 100m water resistance). A spring was then slipped over the button shaft, and the button slid into place. While using a plastic clamp to keep the button depressed, I carefully reinstalled the C-clip.
Next, I placed the chapter ring assembly onto the movement and reinstalled the hands, carefully lining them all up with the 12 o’clock index. I set the movement dial side up on a small block of wood, carefully lowered the case over it, and then flipped it over. Registration notches in the movement and case provided proper alignment.
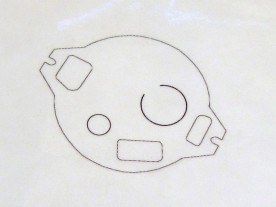
The back of the movement is covered by a clear plastic label to ensure that it remains insulated from the piezo-electric beeper. This label was in tatters when I received the watch, but I was able to make a scan of it, trace the outlines, and make a new label from the same material I used to hold the polarizing filter to the LCD.
- New insulating label printed on transparent adhesive inkjet label.
- The movement reinstalled in the watch, with clear plastic insulating label.
Finally, I applied some silicone grease to the case back gasket, and screwed the case back in place. Done!
Making the Bracelet Fit Better
I have quite small wrists (6.25″ or 159mm). The Pulsar’s bracelet had enough removable links that I could make the bracelet short enough, but the watch still didn’t fit well. The problem was the end links. Due to interference with the ends of the watch case, they could only bend downwards slightly, thus not wrapping around my wrist.
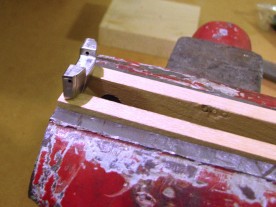
- End link clamped in a hardwood-jawed vice for filing.
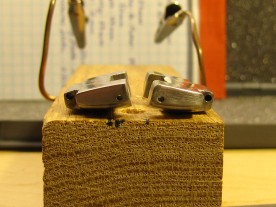
- Original (left) and modified (right) end link, bottom side up.
Normally, I’d have just replaced the bracelet with another bracelet or strap, but the Pulsar has a single central lug instead of the standard two lugs that a strap would fit between. Instead, I rounded the inside lower corners of the end links, allowing them to bend down further. I used a small flat file for shaping and then a Dremel wire brush wheel to smooth things up. The result hugs my wrist like it should.
Conclusion
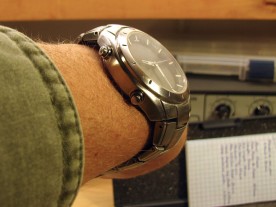
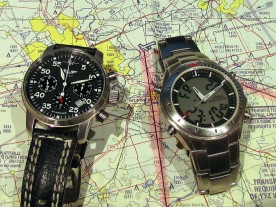
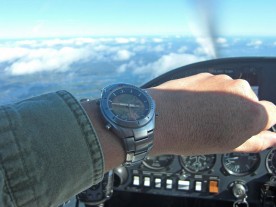
I’m really happy with the way this watch turned out. It definitely pays homage to the Omega X-33, but isn’t a copy. In fact, it is a one-of-a-kind watch that has as much of me in it as it does the watch that inspired it. And like the hand-wound Berkut chronograph shown with it below, it’s a great watch for flying.
- Pilot Berkut mechanical chronograph with my X-33 homage.
- This watch was made for flying.
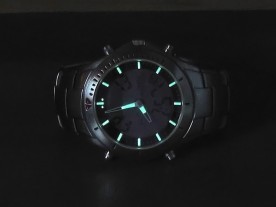
- The lume is very bright, and remains visible all night.
- With the display turned off, the watch has a very uncluttered look.
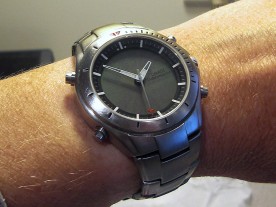
- The three-dimensional nature of the dial is apparent in this oblique shot.
- This must be my lucky day!
November 2013 Update: One thing that had been bothering me about this watch was that the second hand didn’t stop when pulling the crown out even though the manual said it would. I thought maybe I hadn’t seated the stem properly, or perhaps forgot to click something back into place. So I opened up the watch, but couldn’t see anything amiss (but it’s hard to see anything in the analog part of the movement).
In anticipation that I’d like to experiment with the movement in the future, I had purchased a Hattori (Seiko Epson) Y121E movement from Esslinger, as this is (almost) identical to the analog movement in the Pulsar/Omage. Carefully opening and comparing both movements revealed a mysterious lever in the new one. Thinking that this was responsible for stopping the movement, I decided I’d transplant said lever into the old movement. Unfortunately, when I reassembled it, it no longer worked.
Deciding I’d leave well enough alone, I took the lever back out and reassembled the movement again. It still didn’t work.
After several hours of tinkering, and noticing that sometimes the second hand would move a few ticks, and then just start moving back and forth, I came to the (incorrect) conclusion that one of the screws holding the movement together was too tight, distorting the plastic body of the movement and causing the gears to bind. Loosening that screw got the movement working again, except every now and then it still missed a beat.
After wearing the watch for a week, things didn’t improve, so I decided to order a whole new analog movement. It turns out that the correct movement is the Y121E4, which differs from the Y121E by the height of the shafts that hold the hands. The Y121E4 shafts are much longer, since they must pass through the relatively thick LCD and its backlight.
After finding no useful information on Esslinger’s web site (and gleaning no more in correspondence with them), I ordered a pair of Y121E4s from Cousins. Their web site is terrible to use, but at least they have all the relevant information. Also, two movements shipped to Canada cost less than one from Esslinger.
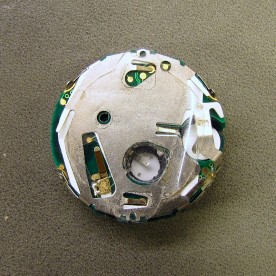
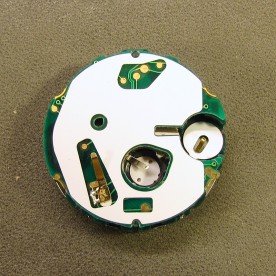
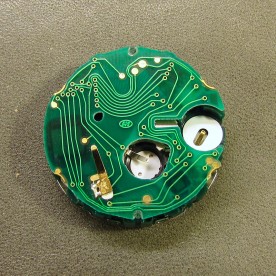
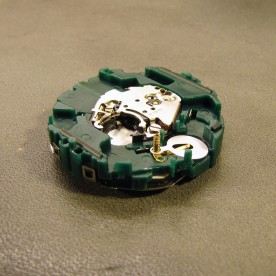
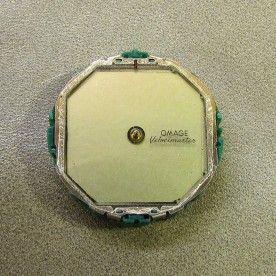
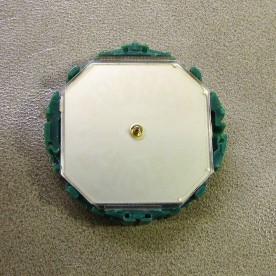
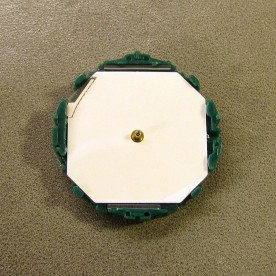
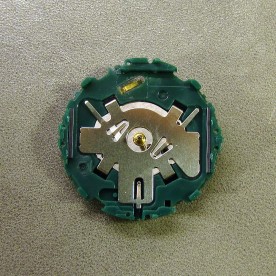
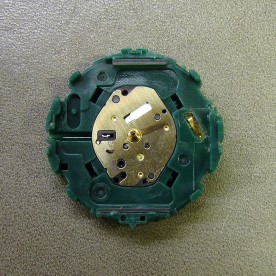
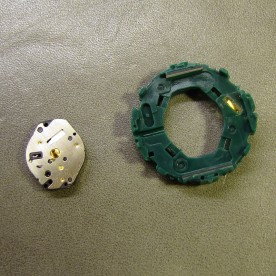
Replacing the mechanical movement involved completely disassembling the digital movement in order to remove the mechanical one.
- The movement with both batteries removed.
- Removing the shield reveals an insulator.
- Below the insulator is the circuit board.
- Circuit board off. Don’t lose that spring!
- The familiar front view of the movement.
- The LCD frame and filter is off.
- Behind the LCD is the back light.
- Another shield retains the Y121E4 movement.
- Finally the movement is clear.
- The analog movement just drops out.
Unfortunately, the new movement exhibited the same problem as the old one. Furthermore, the second hand would swing freely on its shaft, which it did not do with the original movement. Since I’d bought two movements, I tried them both, and they both had the same problem.
I noticed that the movement would never stop if the second hand wasn’t installed, so I started to look for problems there. The hand wasn’t rubbing against the crystal, since the problem happened even with the movement out of the watch. It also wasn’t hitting the indices, since it happened even with the chapter ring removed. I finally took a close look at the second hand itself.
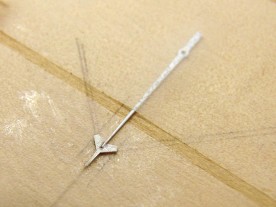
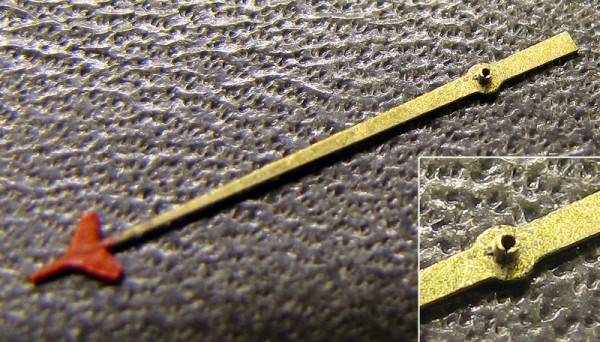
In the close-up, one can clearly see that the tube that fits over the movement’s shaft is split, and one side of the crack is slightly bent outward. I concluded that this flap of metal was rubbing very lightly against the inside of the minute hand shaft, causing the the watch to grind to a halt. Then, depending on wrist movement, the pressure would be relieved and the watch would restart for a while.
I briefly considered trying to repair this by filing off the flap and using shellac to hold the hand to the shaft, but instead decided to make a new hand. Back to Cousins, from which I ordered a variety of second hands to fit 0.2mm shafts.
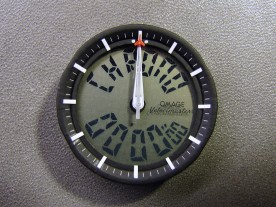
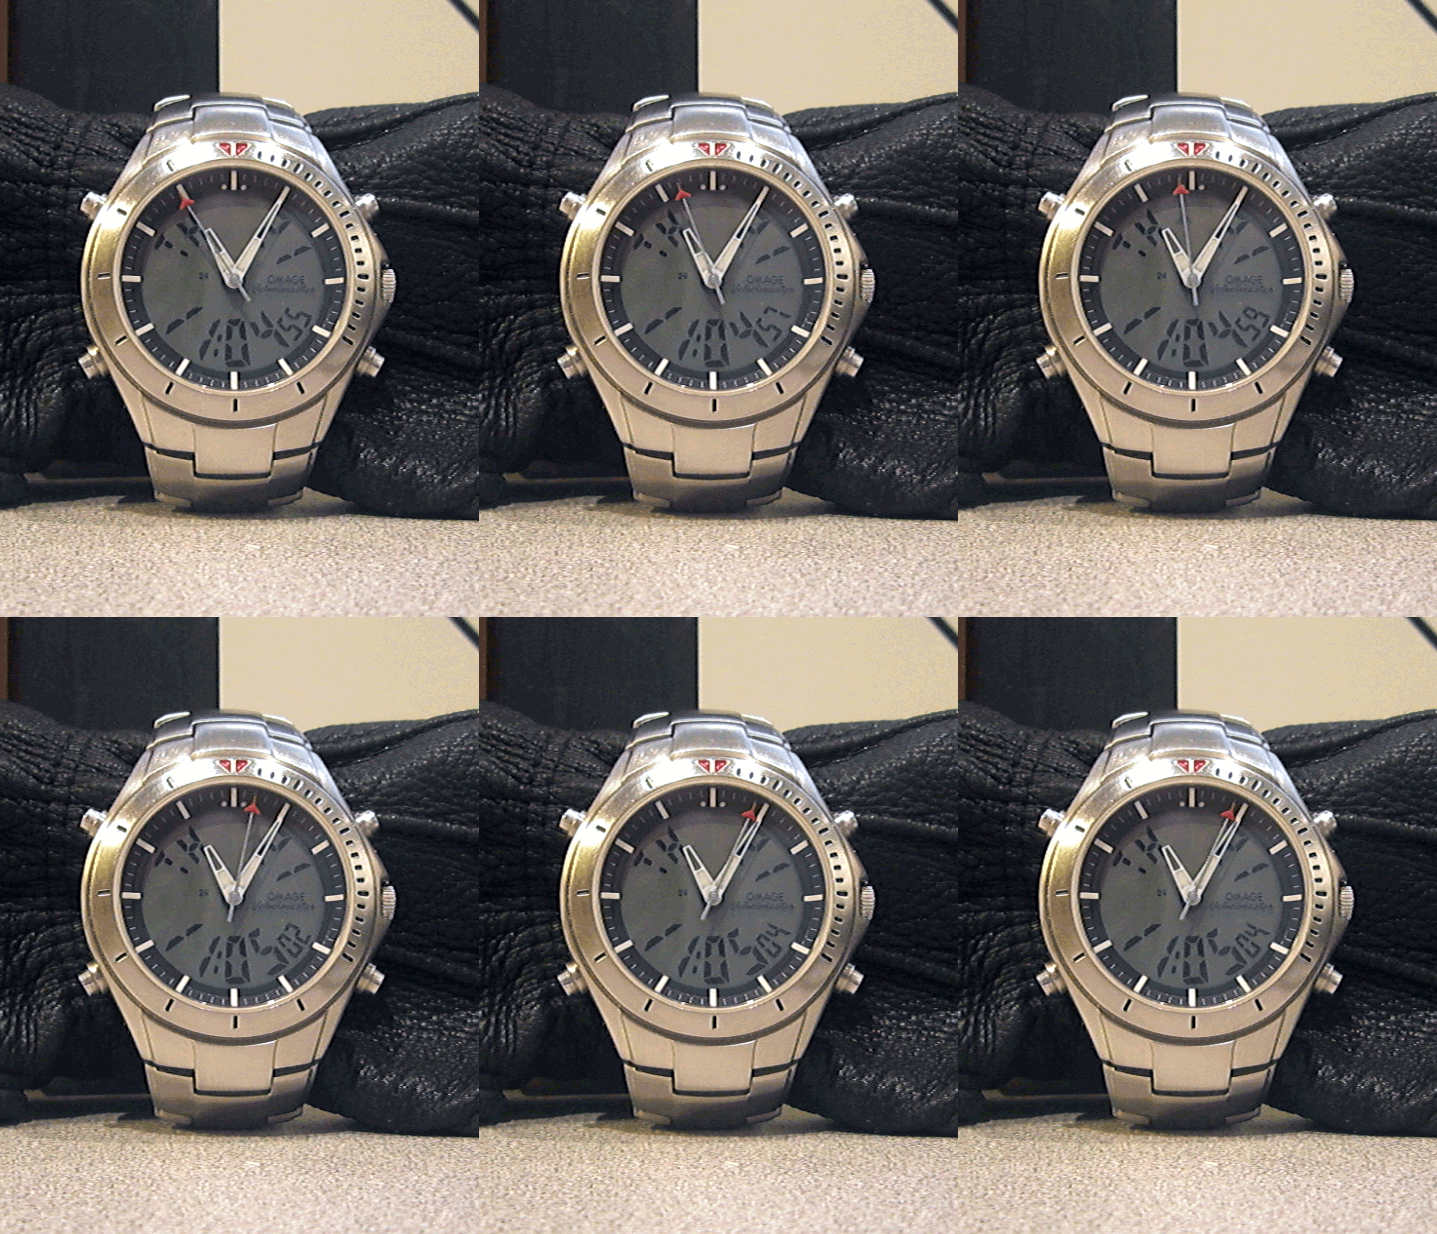
I was dreading re-making that airplane tip, but I found that by heating the old hand with a soldering iron, the epoxy holding the tip in place would melt, and I was able to pull the tip off. After a few evenings of careful aligning, gluing, and painting (including a mishap where the tip went flying across the room but I managed to find it), the new hand was ready. Here it is on the watch.
The new hand is slightly slimmer than the old one, but still quite acceptable.
The new movement seems to have more free play than the old one, with the hand missing the markers by ±1/4 of a second as it moves around the dial. With the old movement, the hand stayed within about ±1/10 of a second of the markers. On the positive side, the rate of the new movement is closer to that of the digital movement, getting out of sync by about 1 second per week instead of 1 second every two days. It is also only about 1 second fast compared to official time after two weeks.
January 2014 Update: The new movement seems to be remarkably accurate, currently running at about +2.5 seconds per month. About once a week, I resync the digital movement to the analog one, which is very easy to do.
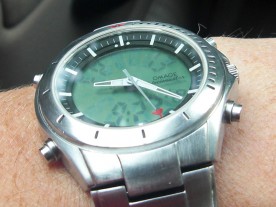
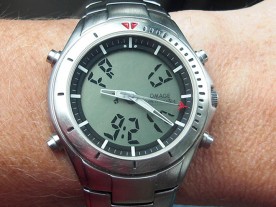
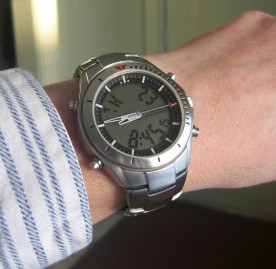
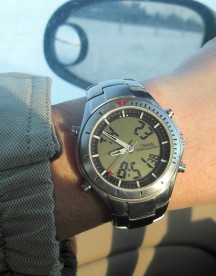
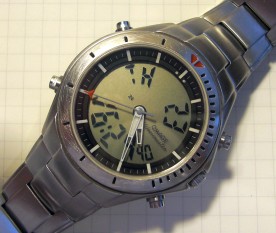
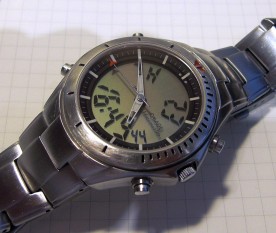
Here are a few more pictures, just because …
- Getting ready to go to work.
- Heading down the driveway.
- Almost face-on close-up.
- Oblique close-up.
Related Articles
If you've found this article useful, you may also be interested in:

If you've found this article useful, consider leaving a donation in Stefan's memory to help support stefanv.com
Disclaimer: Although every effort has been made to ensure accuracy and reliability, the information on this web page is presented without warranty of any kind, and Stefan Vorkoetter assumes no liability for direct or consequential damages caused by its use. It is up to you, the reader, to determine the suitability of, and assume responsibility for, the use of this information. Links to Amazon.com merchandise are provided in association with Amazon.com. Links to eBay searches are provided in association with the eBay partner network.
Copyright: All materials on this web site, including the text, images, and mark-up, are Copyright © 2025 by Stefan Vorkoetter unless otherwise noted. All rights reserved. Unauthorized duplication prohibited. You may link to this site or pages within it, but you may not link directly to images on this site, and you may not copy any material from this site to another web site or other publication without express written permission. You may make copies for your own personal use.
Techman
September 29, 2013
Nice write up. I was wondering how you modified you watch to make omage, now I know.
Tom
October 01, 2015
I am completely impressed! You have skills!!! Thank you so much for sharing your work on this watch. I have the same Pulsar and have worn it daily for 6 or more years. Yours is just amazing!
Adam Mutum
November 06, 2015
You have great skills. Really motivated me to try out my own watch mod project.
Scott
November 25, 2015
Wow, that is some nice work. I don’t know if I have the time or patience to mod a watch so much – something to look forward to in retirement!
Mike Carpenter
February 22, 2016
I’m impressed with your skill and patience! I have an X-33 and that is a very good homage.
DONALD WARDY
July 21, 2017
WOW!! I wish i could find once like this before dropping 2k on a gen 2..
LOVE THE IDEA! The LCD even looks sharper than original x-33..
Agnaldo
February 21, 2018
Hi, Friend! Could you tell me at what website can I buy the digital movement for my projects?
Stefan Vorkoetter
February 22, 2018
I don’t know where to buy digital movements. I just bought a whole watch to modify.
Jean Pierre
August 01, 2018
Great job indeed ! I own an Omega X-33 first gen as well as a samsung with the same hattori quarz caliber very similar to your assembly. I love both watches even if one cost 120 time the second, and I love your Velocimaster very much, Bravo !
Roland Delaune
October 07, 2018
Thanks for the great tutorial! I would like to try this project myself, but I’m having trouble finding a Pulsar NX01-X001. In your tutorial you mentioned that you knew of some other watches with curved digital displays. Do you remember the names of some of these other watches?
Thanks!
Roland
Stefan Vorkoetter
October 09, 2018
There were several Pulsar models in the NX01 series, and the Bulova Marine Star 96c12 used this movement too.
James E Smith
March 31, 2019
Do you know why LCD displays often have this kind of grey “speckled” background to them? Is it to try to scatter light in as many directions as possible or something?
https://cdn-reichelt.de/bilder/web/xxl_ws/A500/LCD_4_0-13.png
Stefan Vorkoetter
March 31, 2019
I think it’s basically to reflect as much light as possible without making the background a mirror. It’s probably made by spraying some sort of metallic coating, much like the finish you’d get from silver spray paint.
David
April 30, 2020
I love this mod, I’m thinking of doing something similar (likely just inverting the LCD and adding lume). I have a few questions though which might make my job easier
1) I don’t totally follow how the adhesive holds the polarized filter in place. Is the adhesive a bit wider than the filter?
2) Do you happen to still have any of the images you printed? If so, would you mind sharing?
3) Was any special tool required for removing/re-applying the hands? I’ve not done this before but it seems like delicate work.
4) Are these the labels you used? https://laserinkjetlabels.com/products/blank-laser-inkjet-labels-on-sheets/clear-glossy-labels-inkjet/
Thank you!
Stefan Vorkoetter
April 30, 2020
David, in answer to your questions:
1) Yes, the clear film is wider than the polarizer. If you look closely at the “New polarizer installed …” pic, you can see the edges of the label on the metal ring surrounding the LCD.
2) I’ll see if I can find them and e-mail them to you.
3) I used a hand puller and hand setters. Yes, it’s a pretty delicate operation.
4) Those labels you link to are advertised as having “no frost”. The ones I used had a frosty finish, but the no-frost ones would probably actually look better.
DAVID
May 02, 2020
Thanks! I hope you’re able to find the images, they’d be very helpful!
I have one more question. Am I correctly reading that you applied the lume to he reverse side of the watch hands?
Stefan Vorkoetter
May 02, 2020
Hi David. I looked for the images, and so far have been unable to find them, which is odd, since I generally keep everything. I’m sure they’ll turn up. Yes, the lume is applied from the back sides of the hands. That’s the standard way to apply lume (except for the part about putting tape on the front sides).
David
May 17, 2020
Here is my homage to your homage:
https://www.dropbox.com/s/3zrobo80b9xul7h/2020-05-16%2022.34.32.jpg?dl=0
Mine is certainly the lazy man’s version. Left out the inner ring entirely, and just painted the head on a spare second hand I had laying around. There are a few things I need to fix
– lume is puffing out from underneath the hour hand
– my second hand seems to occasionally have the same issue yours was having. (doesn’t hack, occasionally stalls/reverses)
– seems like the light (upper left button) doesn’t work correctly anymore. does yours do the same?
Also, what size sapphire glass did you order? I might do the same.
Stefan Vorkoetter
May 17, 2020
David, the light on mine works fine. It’s very dim though unless the battery is new. The sapphire was 30.0 x 1.5mm.
DAVID
May 17, 2020
New battery did the trick. Thanks Stefan!